Building the Vega 4x5: My First Large Format Camera
Note: I use affiliate links in this article. They cost you nothing, but I get a small commission for each purchase made through these links.
Photography has been my hobby (and a side gig) for most of my life, but I’ve always stuck to 35mm or medium format because the cost of large format was just too high. Well, large format cameras that shoot 4x5” film are decently affordable now, especially if you already own a 3D printer. I did a little research, and eventually landed on the Vega 4x5. It seemed to have the most active community, and the author provided the Autodesk Fusion files if I wanted to make any modifications (which I did).
Parts Overview
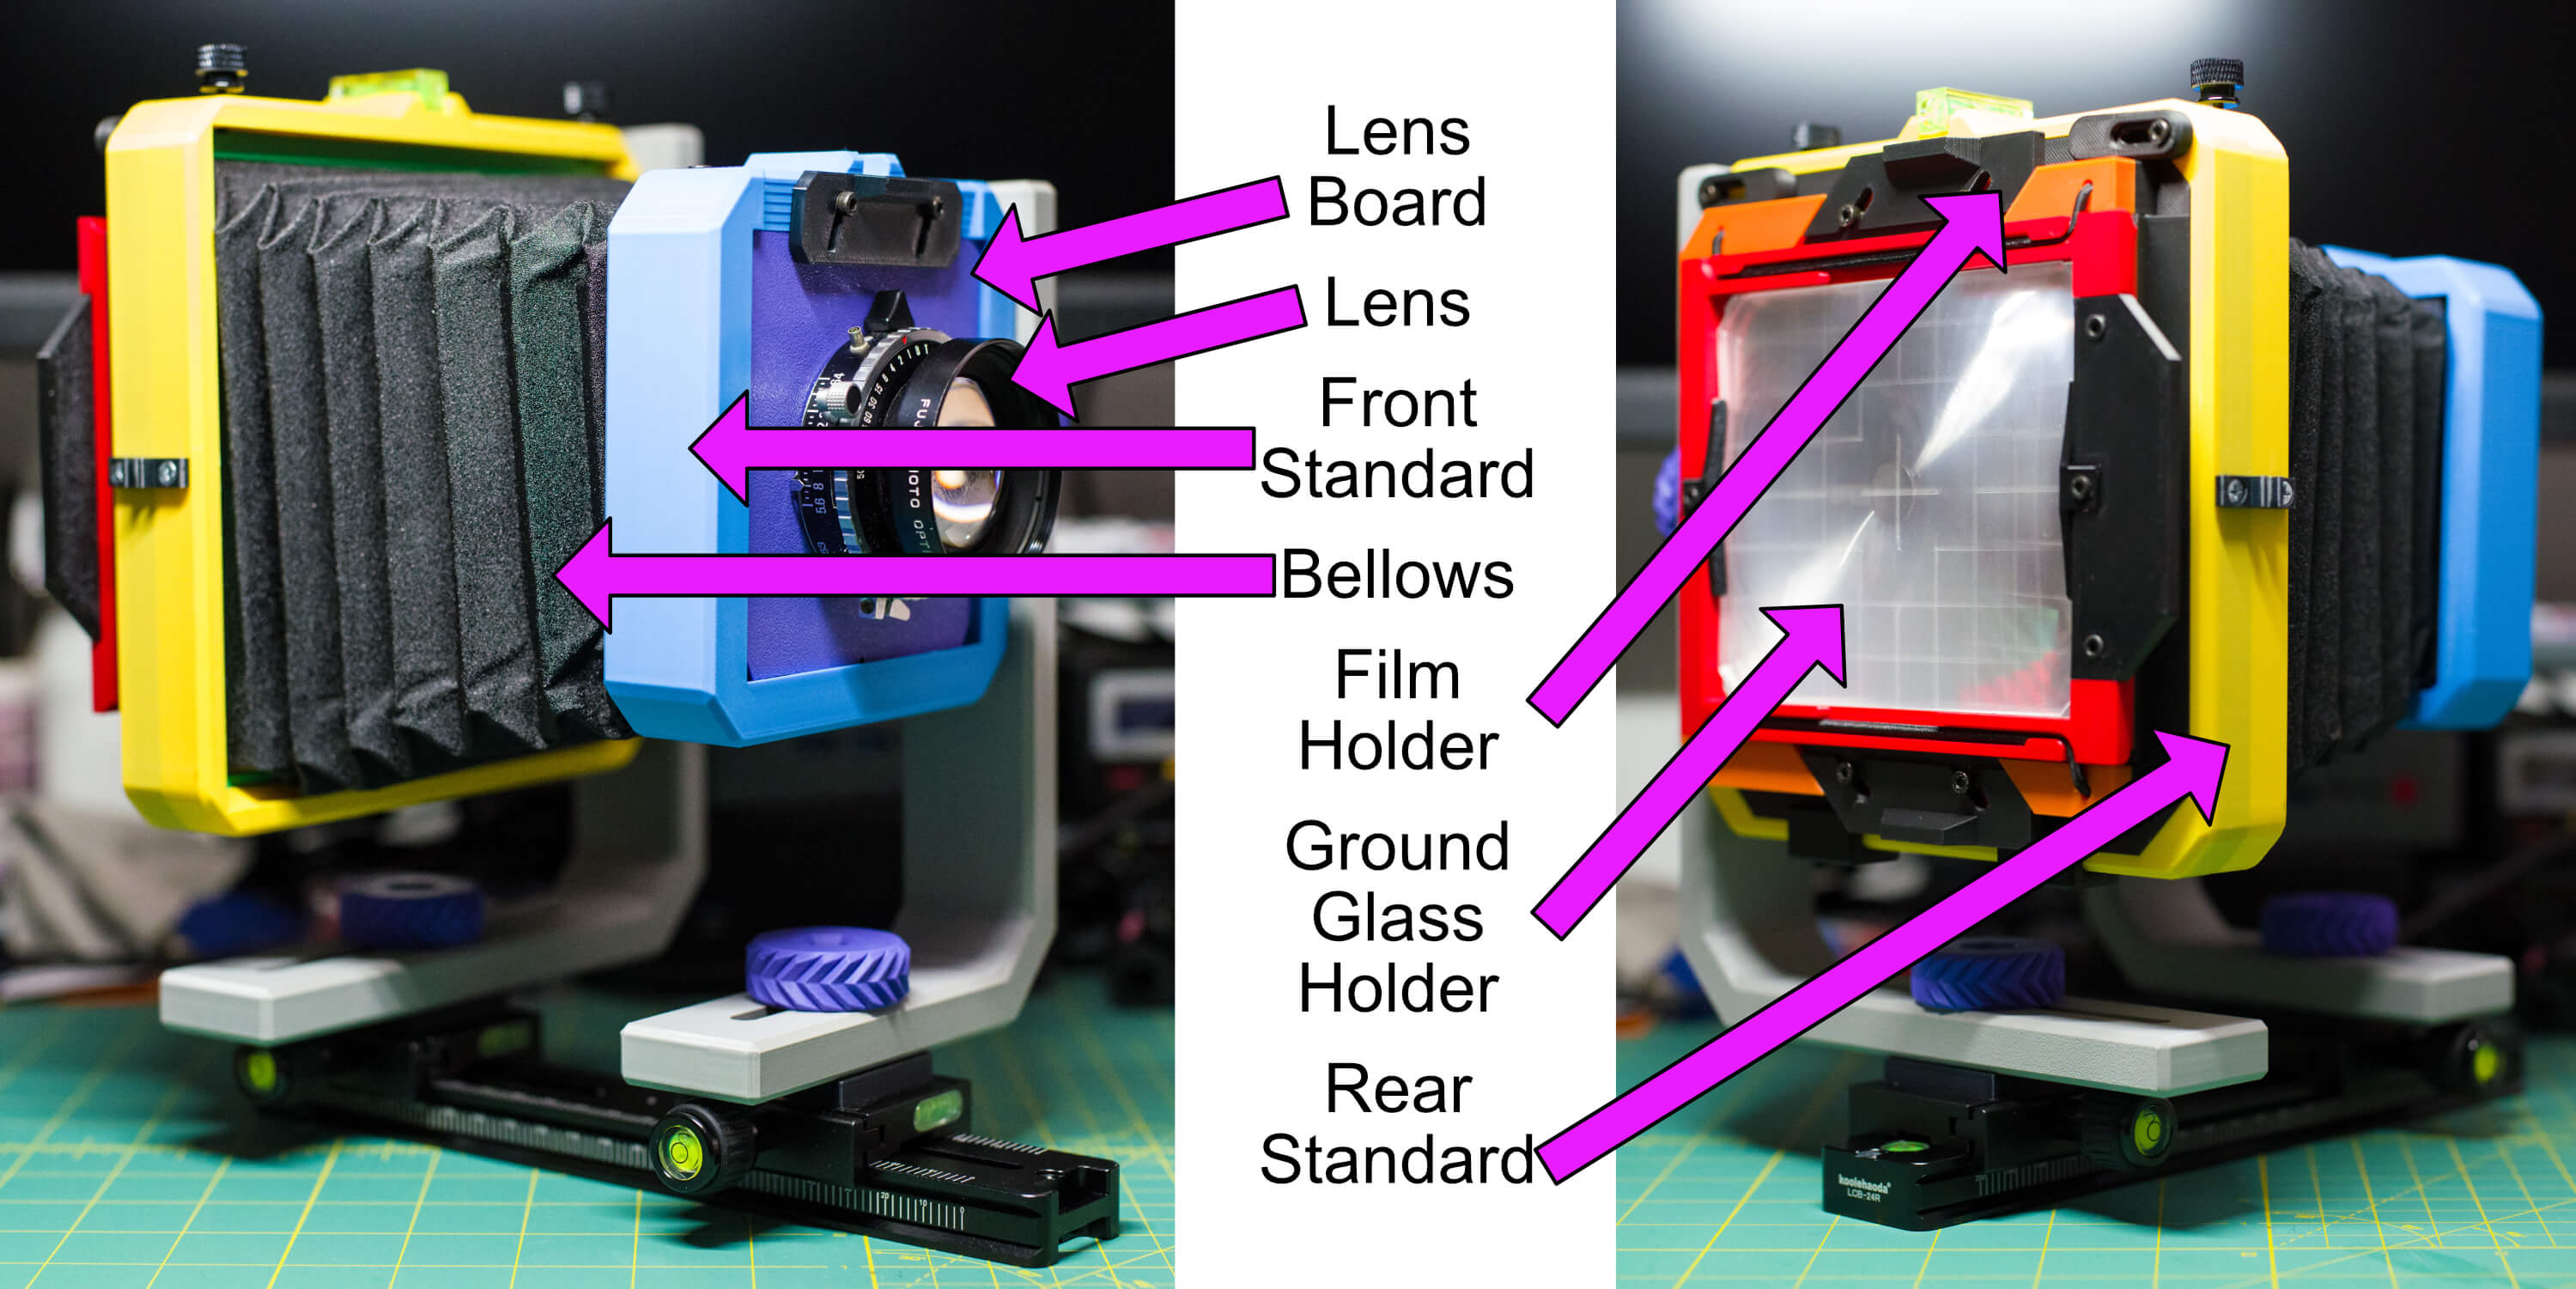
Lens
This particular style of large format camera requires a lens that has a shutter mechanism built into it. The shutter sits between the front and rear glass of the lens. The lens board sits between the shutter and the rear glass of the lens. Here’s a side view to better illustrate this:
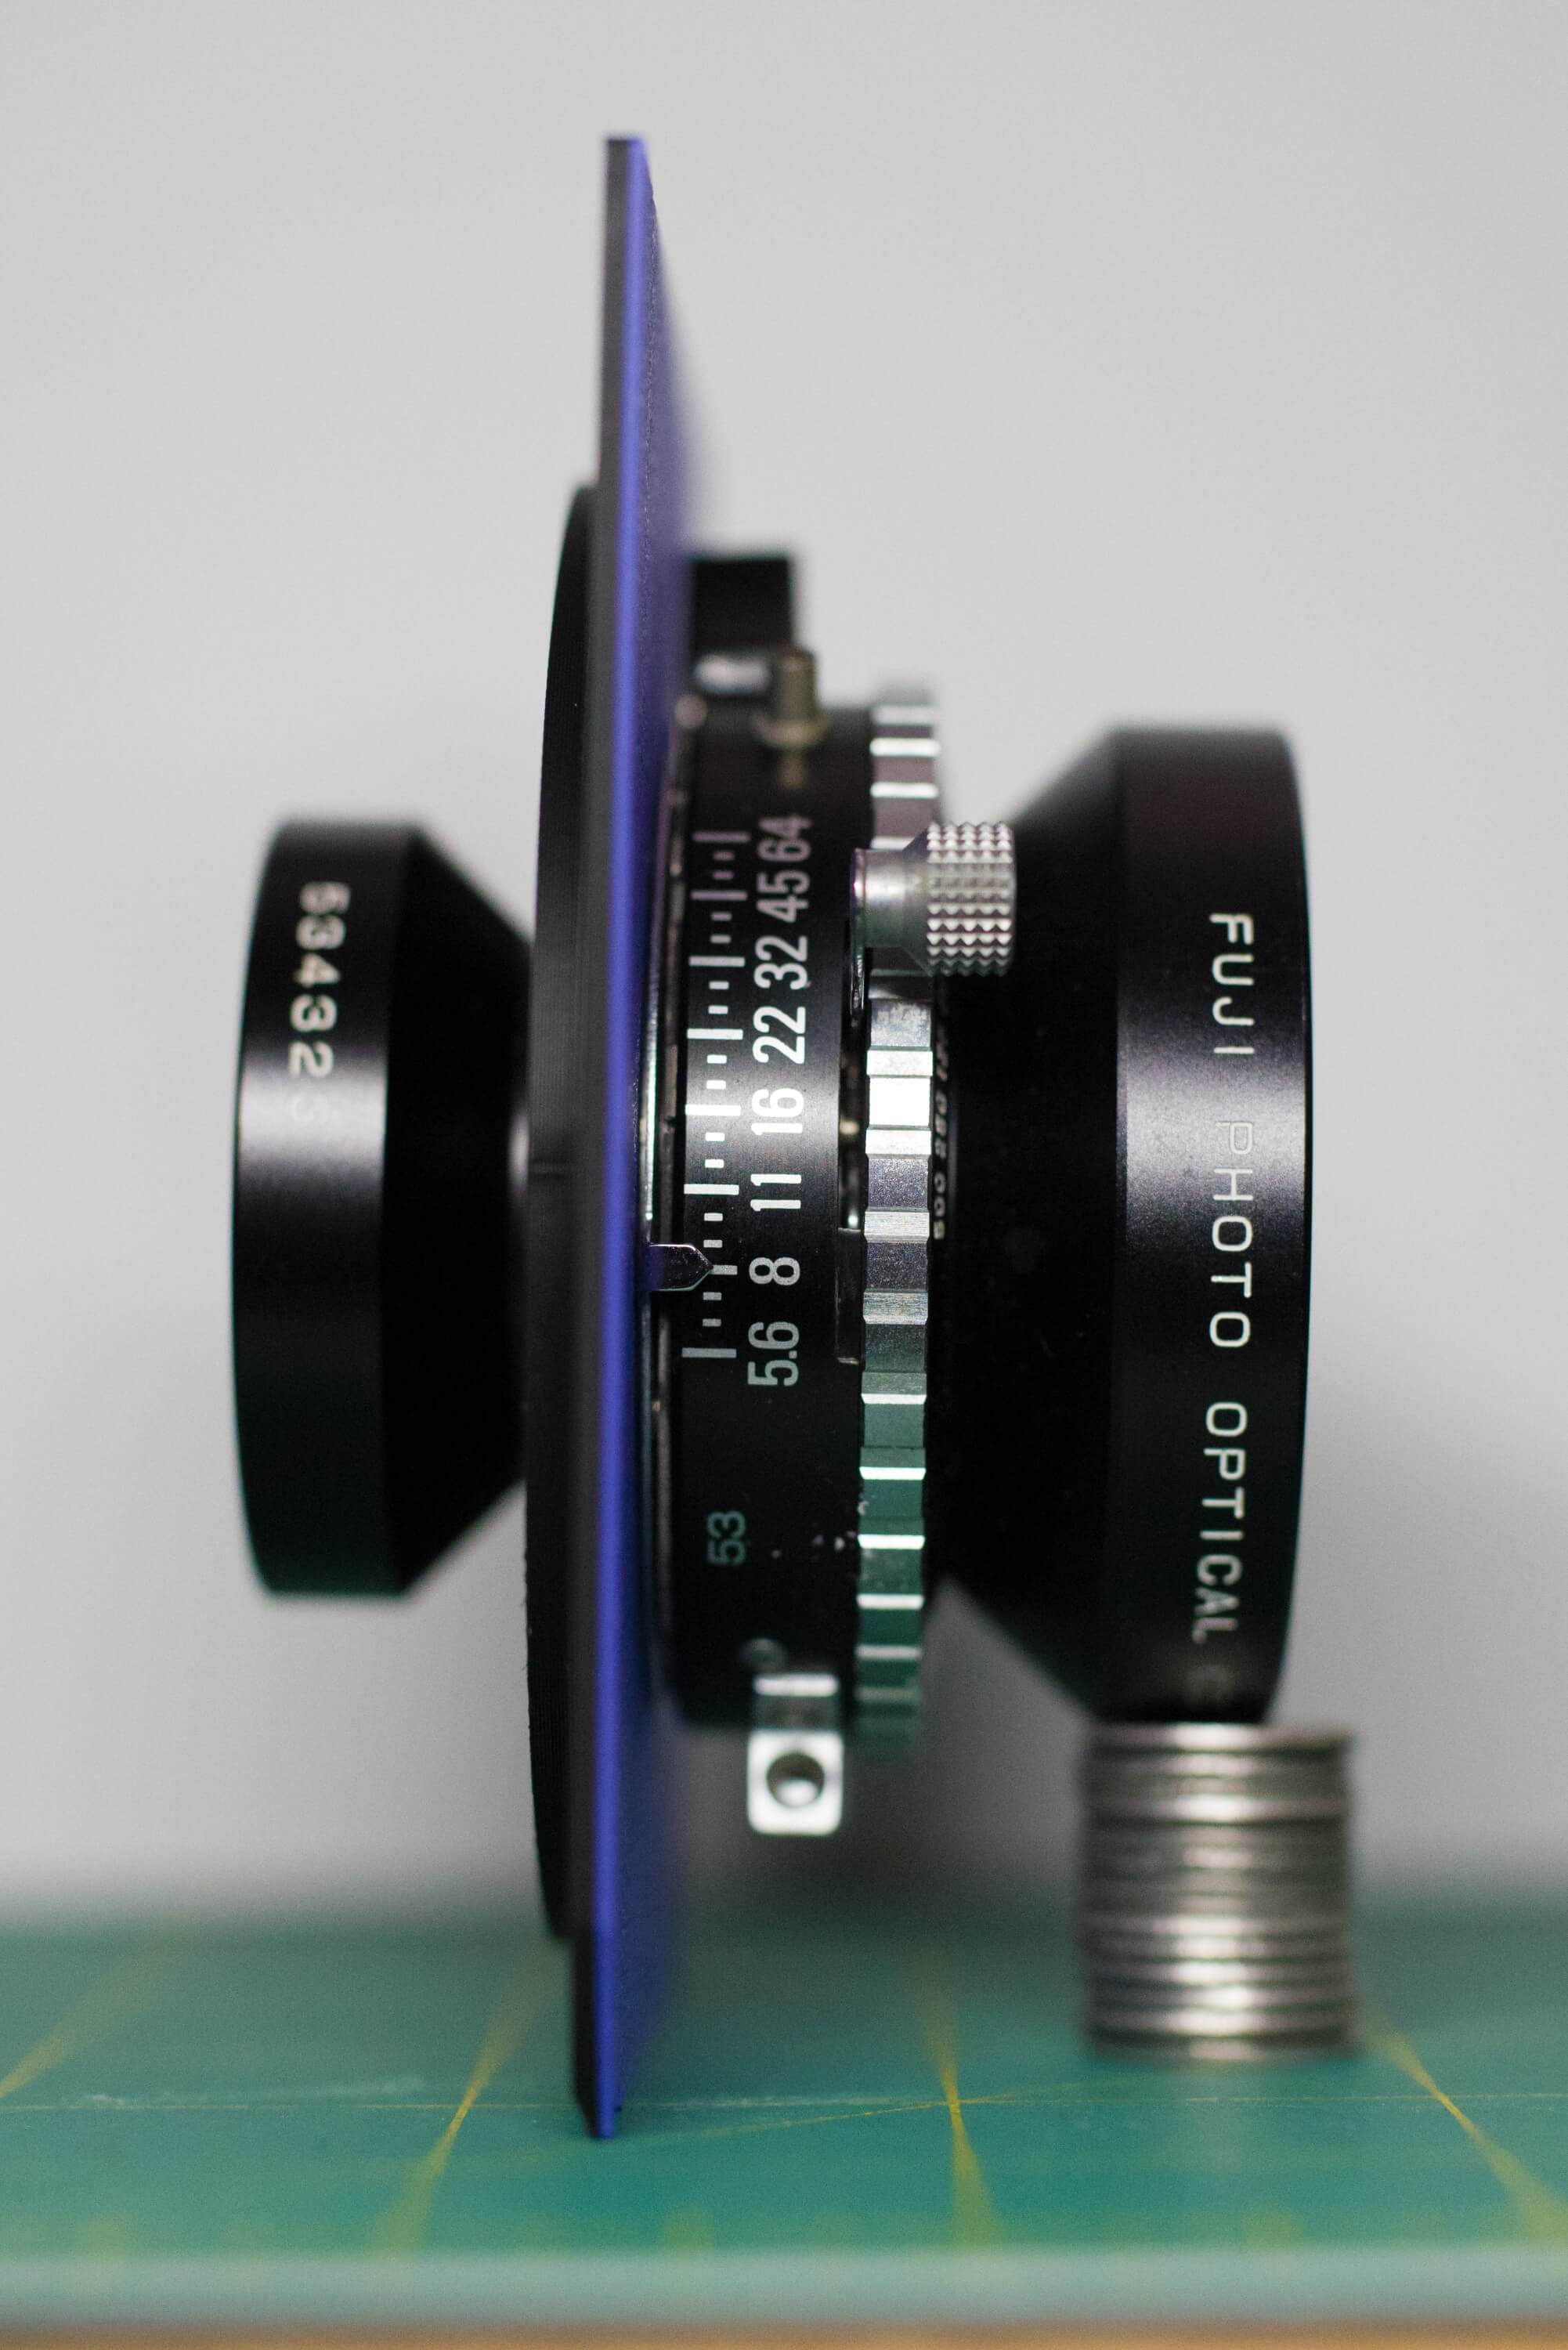
The lens is measured in the distance from the film at which it focuses. This lens is a 150mm, meaning that the front of the lens sits (more or less) 150mm from the film when it’s focused at infinity. If the lens is pushed farther away from the film, it focuses at closer distances.
Lens Board
The lens is mounted to this board so that it can be mounted inside the Front Standard while blocking out all light. Typically, you will keep each lens attached to a lens board so that it’s easy to swap them in and out of the camera. They come with different sizes of holes, usually measured by “Copal” followed by a number. Research (or measure) your particular lens to make sure you print out the correct size for it.
Front Standard
Similar to the Rear Standard, the Front Standard holds the bellows and lens together and mounts to the fork to allow for movement of all pieces in concert.
Bellows
Because the lens is not able to focus on its own, we need a flexible, light-tight material that can allow the photographer to move the lens closer or farther away from the film to achieve focus. This particular bellows is folded like an accordion, and allows for a lot of freedom of movement. There are other types of bellows that are better for different types of lenses. This one is made out of window blackout film, spray adhesive, and cardstock (for stiffness).
Rear Standard
The frame that holds the film holder and bellows together and mounts to the fork to allow for movement of all pieces in concert.
Film Holder
This holds the ground glass and/or film back. The default one for the Vega 4x5 uses elastic cords to hold the ground glass in place as you slide a film back behind it. In the Accessories section, you’ll see that I replaced this with a different back that adds more compatibility for other styles of backs.
Ground Glass Holder
This will hold a piece of ground glass, which is glass that has been textured on one side. The light coming into the lens is focused onto this glass, giving you a preview of the image that will be captured.
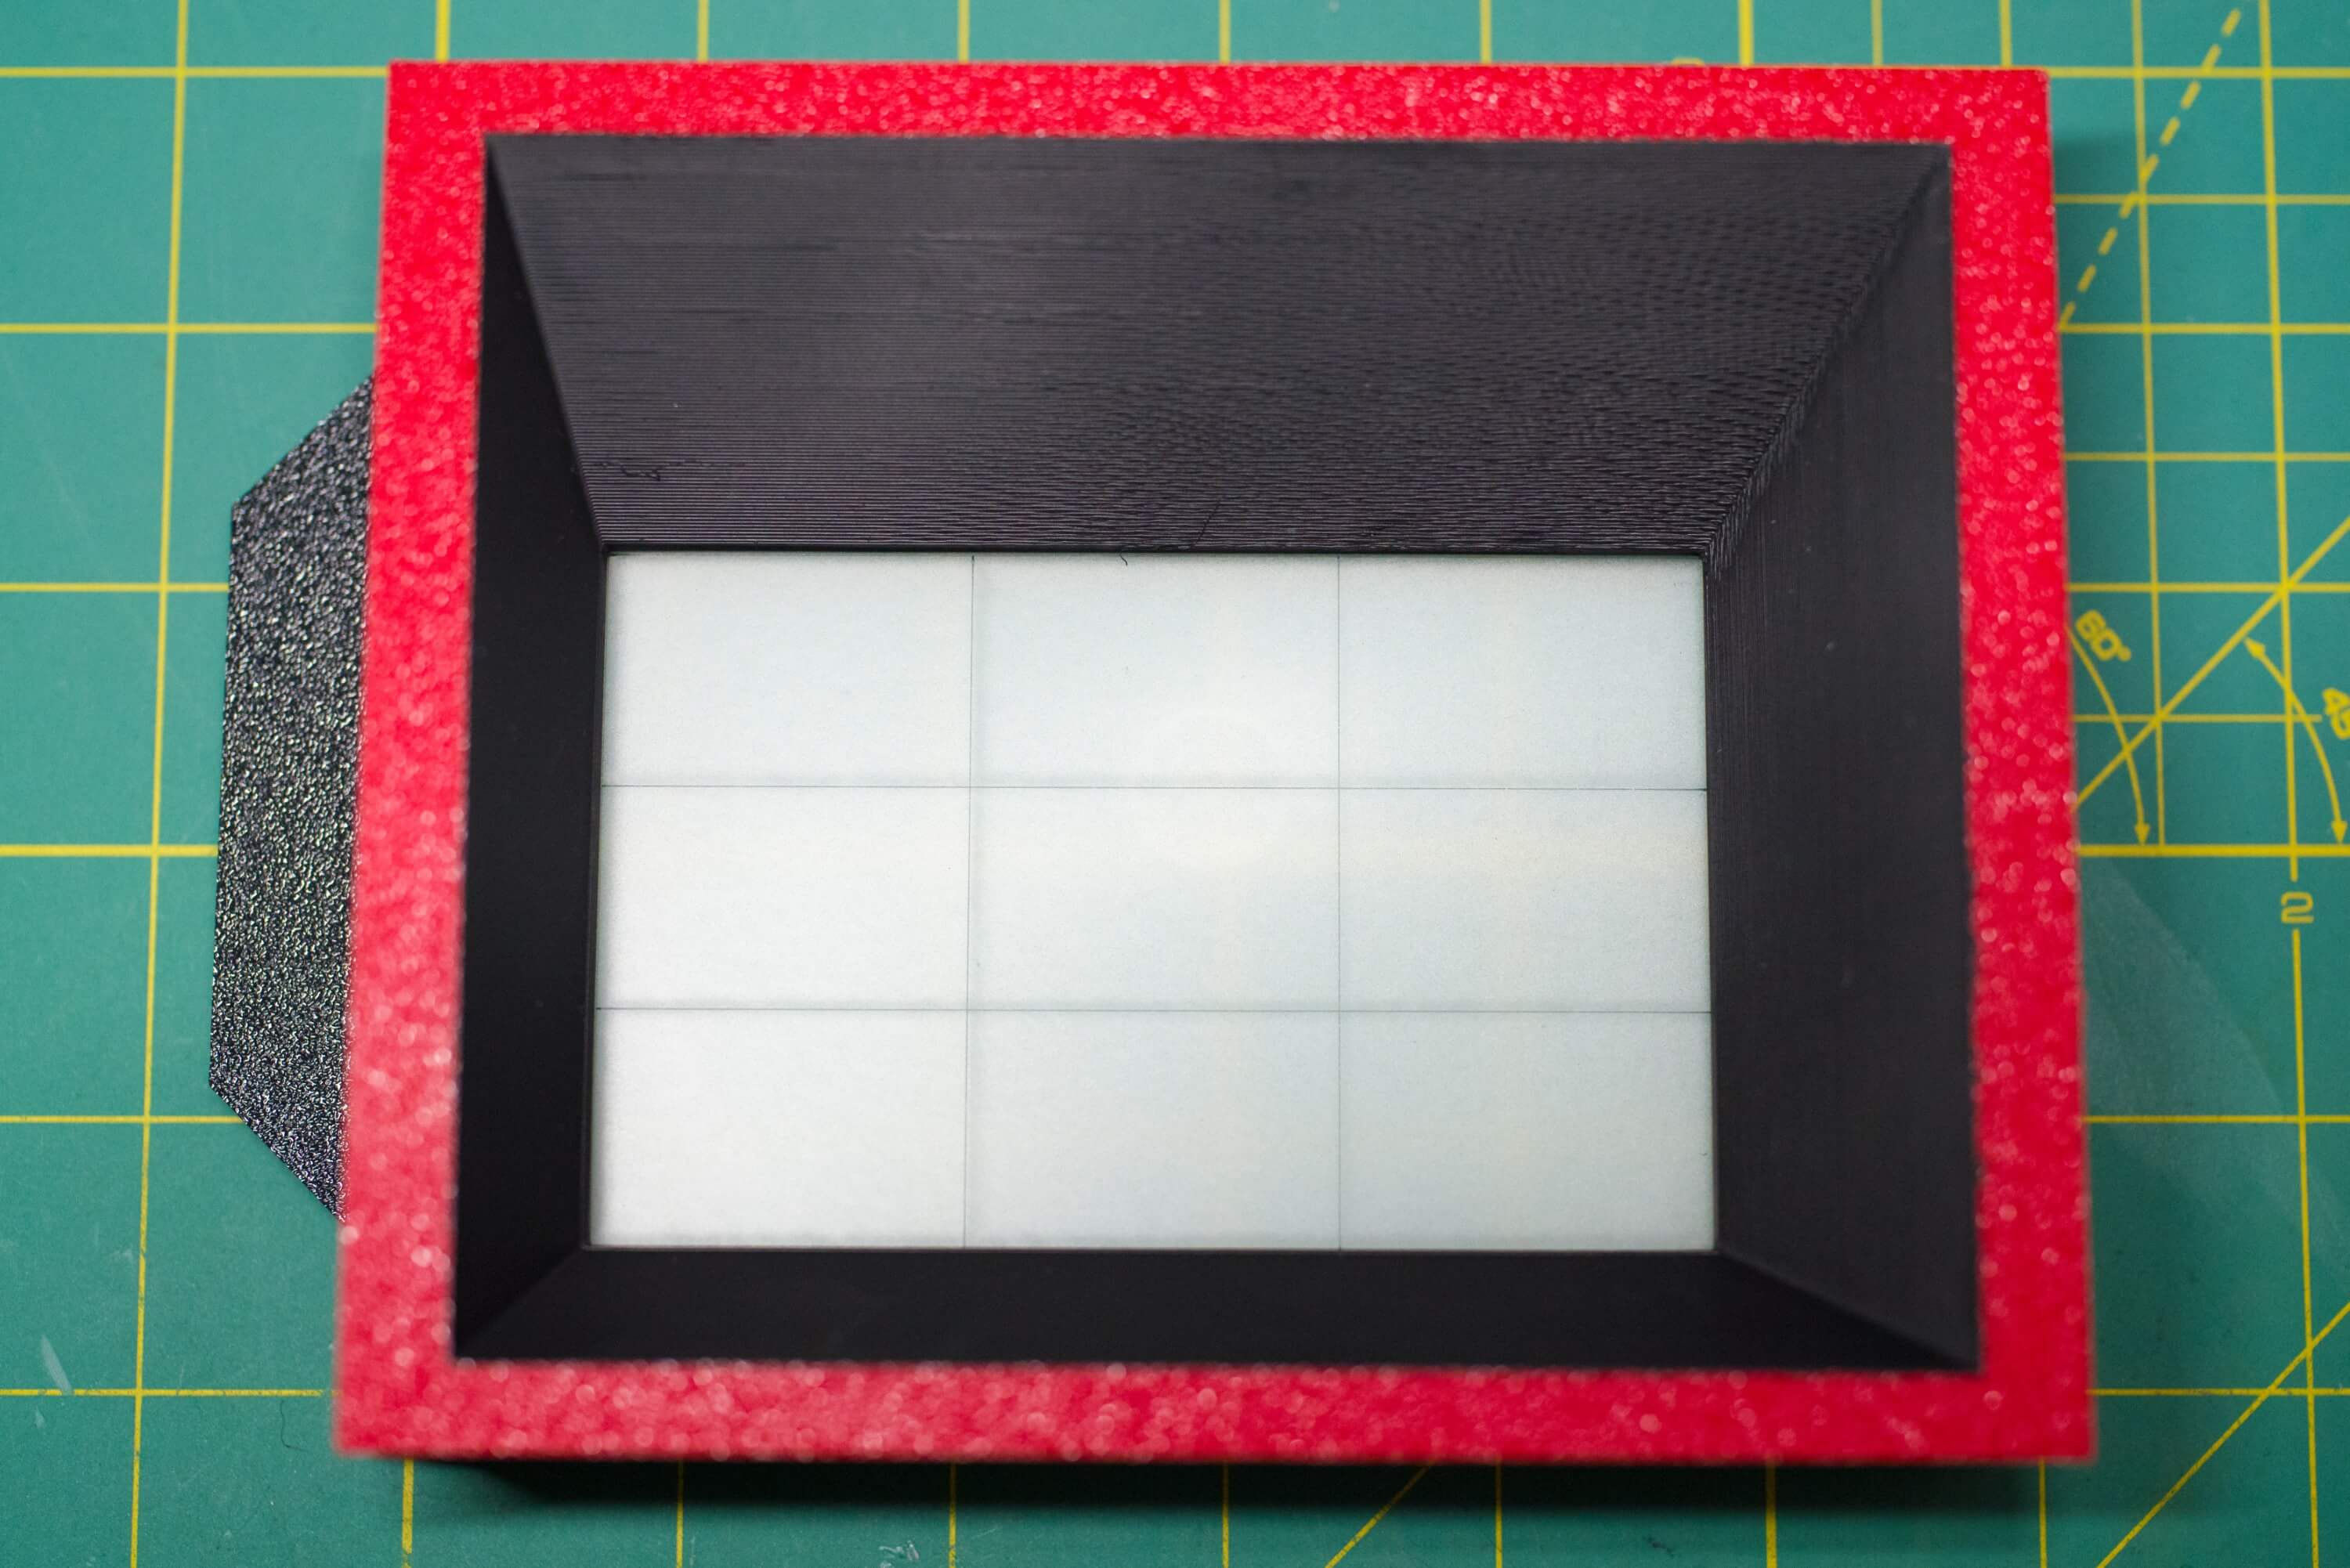
Ground Glass Alternative
Rather than getting an actual piece of ground glass, I decided to experiment with a cheaper option: 1/8 inch Frosted Acrylic. I had my friend laser cut it to the correct size and etch frame lines into it.
Modifications
While the stock camera is great, I changed a few things about it based on my personal preferences.
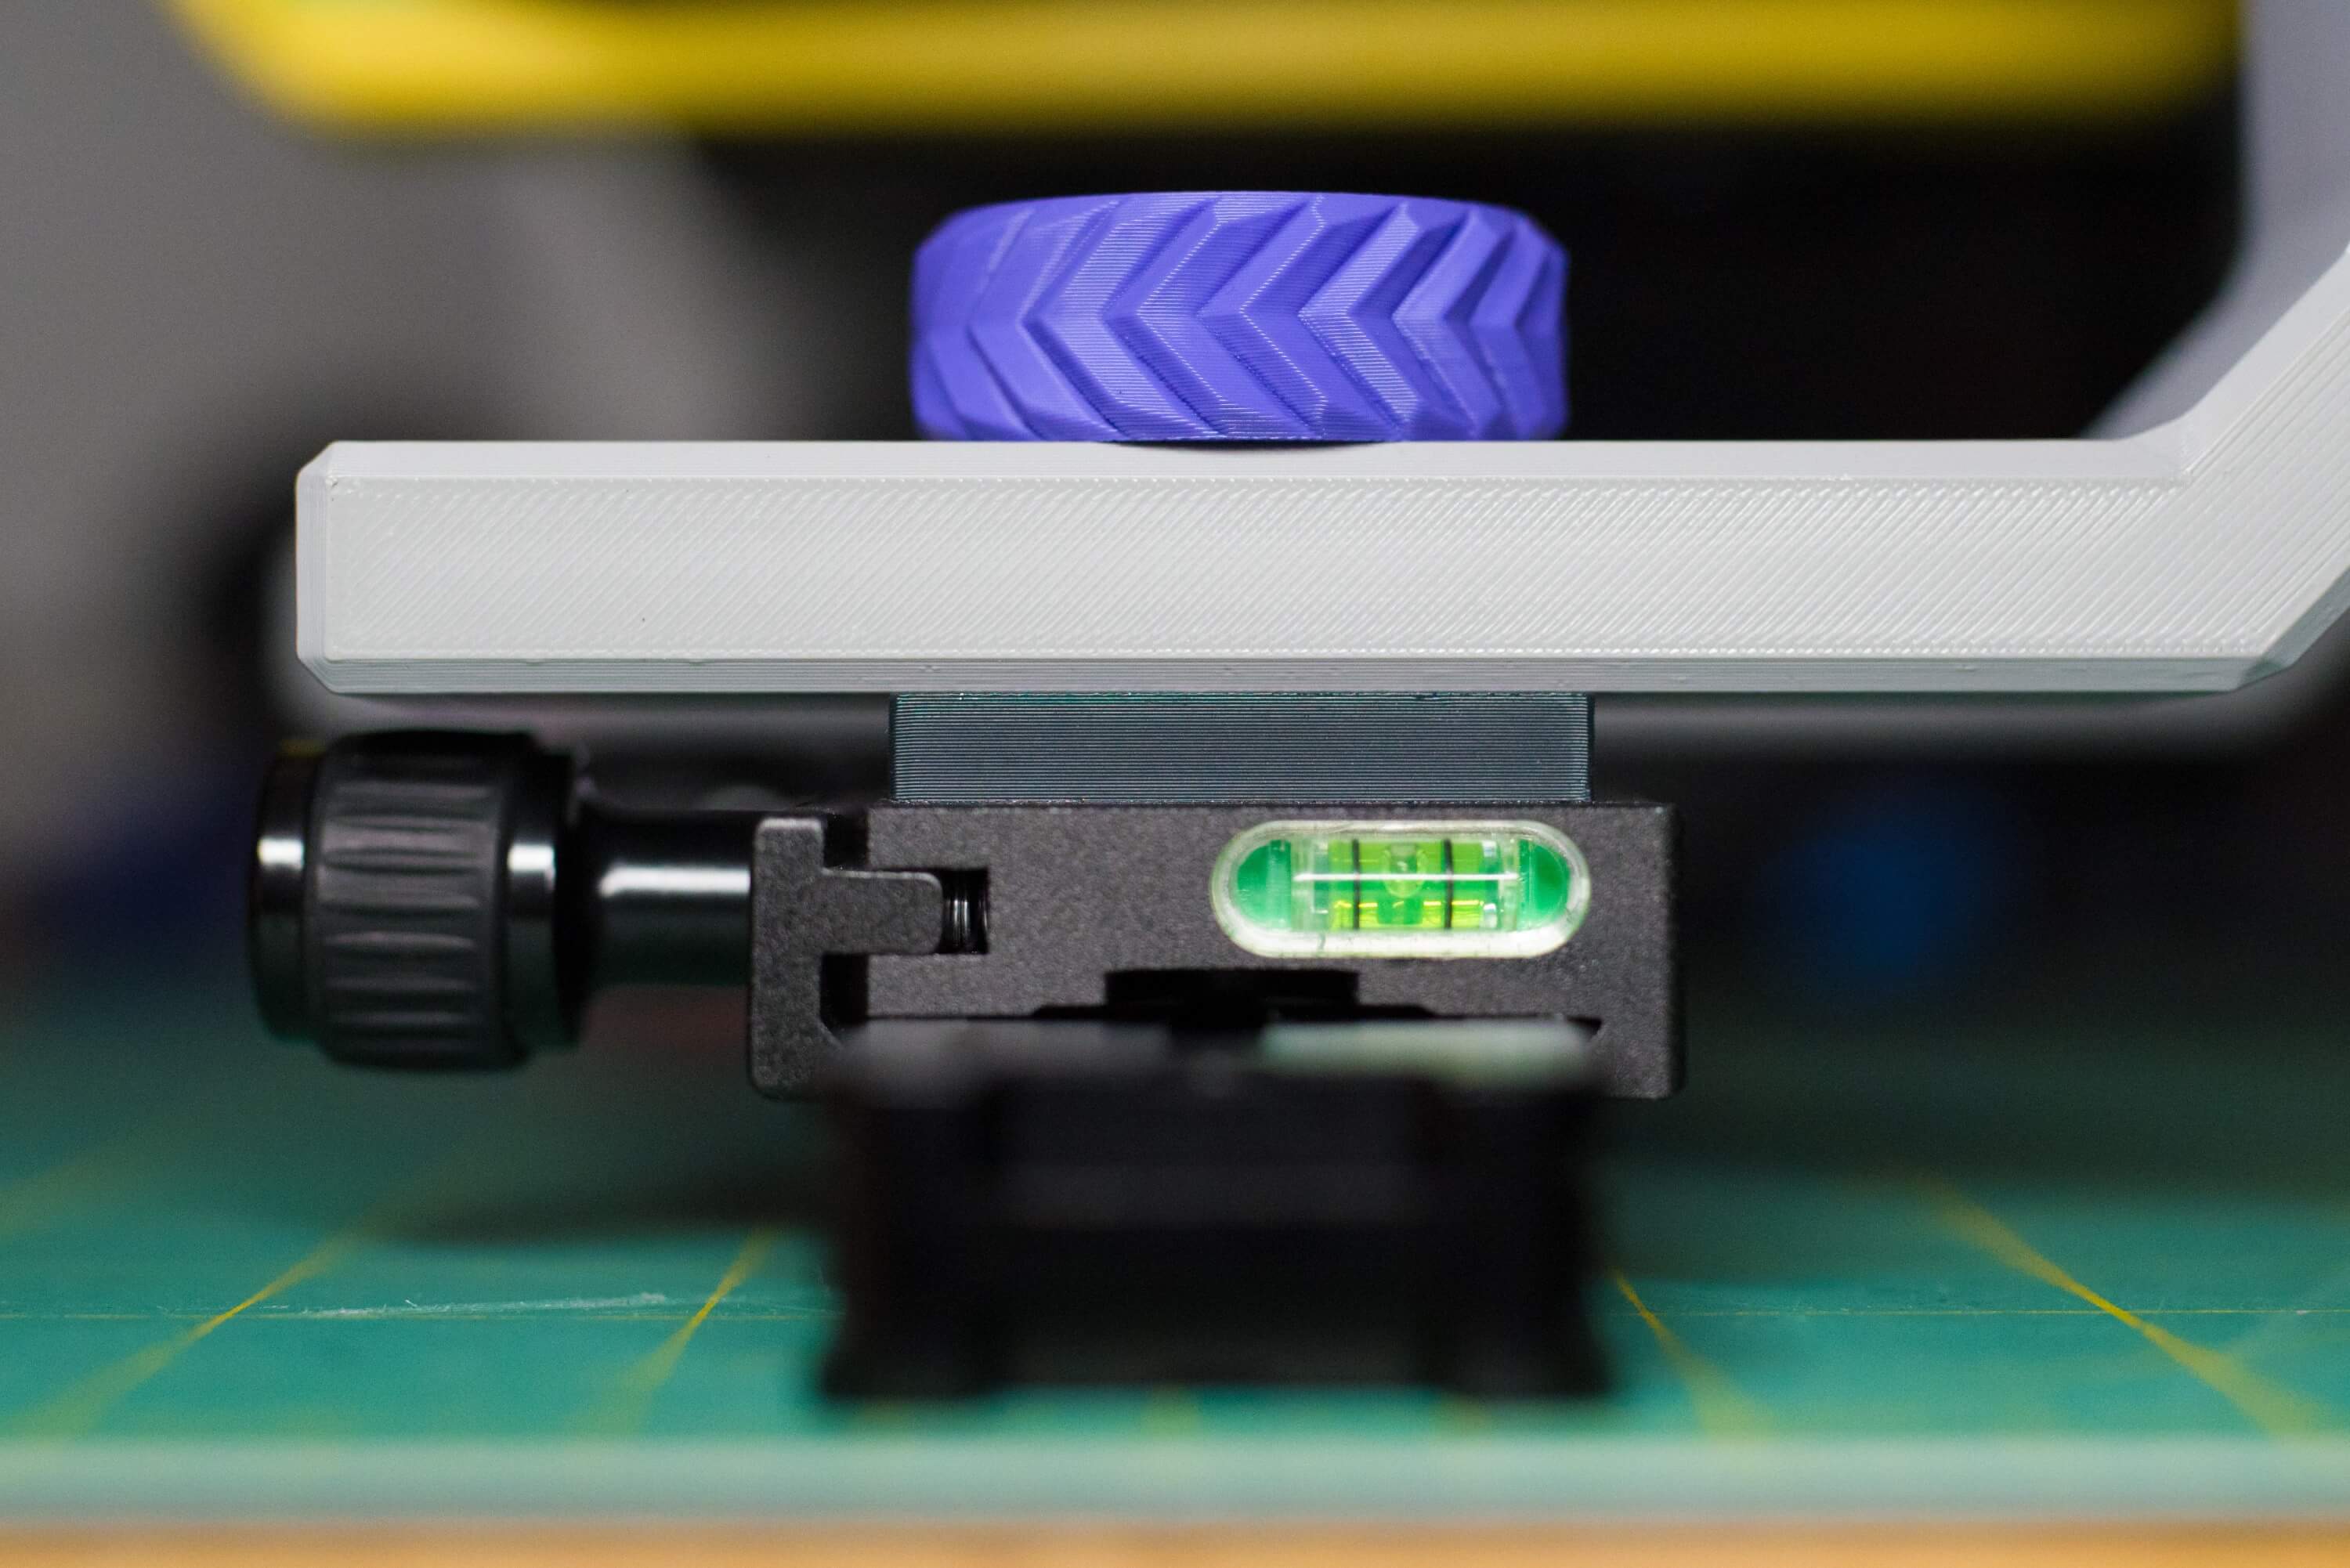
Arca Swiss Rail
The original design used a piece of aluminum square tubing or extrusion, but I decided to use a double-sided arca swiss-style rail instead. This allows me to mount the rail to my tripod at any point along the rail, and I can use sturdy, readily-available arca swiss-style clamps for the front and rear forks. These rails can be bought in different lengths, depending on what lenses you’ll be using. I’m currently using the 240mm rail, but I also have a 400mm rail if I end up using a lens with a longer focal length.
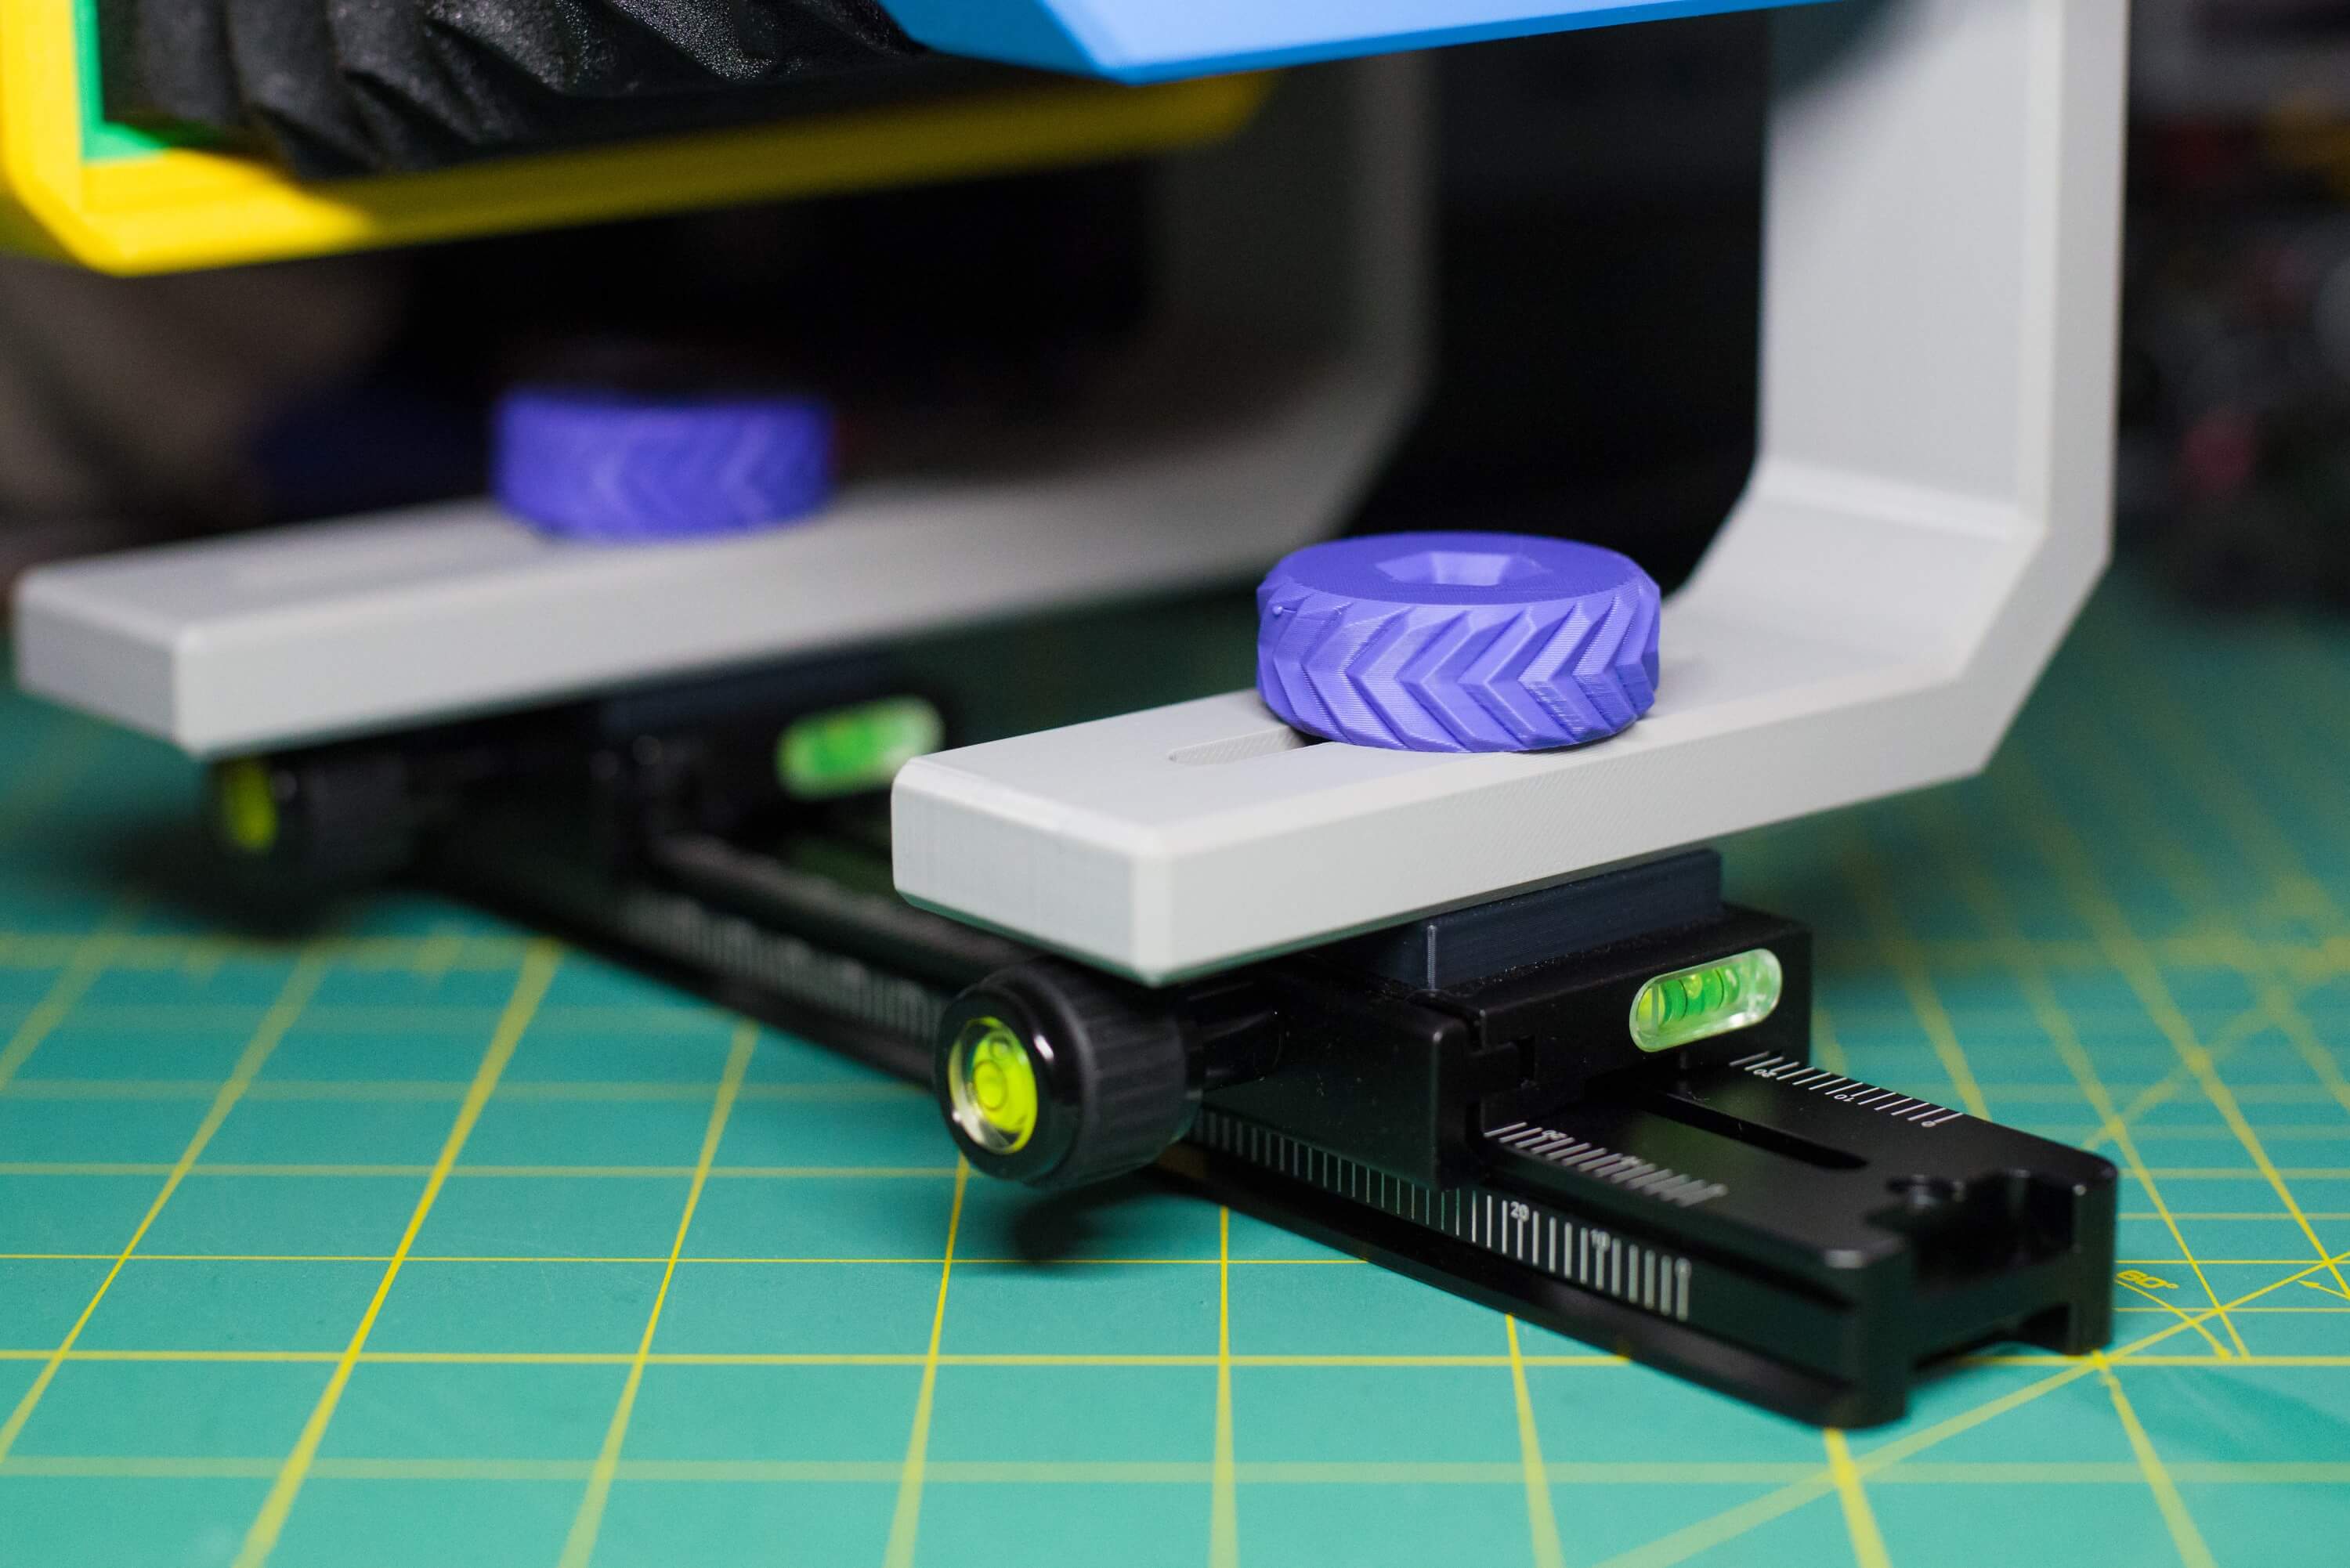
To get this to work, I had to modify the forks to accept 1/4”-20 bolts on the bottom instead of the 6mm bolts in the original design. I also had to add spacers between the arca mounts and the forks to clear the clamp knobs.
Assembly
Parts to Print
From Vega 4x5
- Front Standard
- Rear Standard
- Front Bellows Frames
- Rear Bellows Frames
- Front Graflok Tab
- 2x Top Clip
- 2x Bottom Clip
- 2x Knob
- Lens board(s) matching your lens(es)
From Vega 4x5 Graflok Film Holder
- Graflok Clip Back Left
- Graflok Clip Back Right
- Film Holder Graflok
From 4x5 Graflok compatible Groundglass Holder
- Vega Handle
- 2x Vega Lock
- GroundGlassHolder-Normal Threaded (Or the heatset insert one if you want)
- Any frame masks you want depending on what film you’ll be using
From Arca Rail Mod for Vega 4x5
- Front Fork 1_4-20
- Rear Fork 1_4-20
- 2x Bottom Fork Knob 1_4-20
- 2x Rail Clamp Spacer
Additional Hardware
- M6x30 Hex Head Bolts
- M3 Hex Socket Cap Screws
- At least 2 Arca Swiss-Style Clamps, but buy an extra if your tripod doesn’t work with Arca Swiss.
- 240mm or 400mm Arca Swiss-Style Double-Sided Rail
- 1/4”-20 x 1-1/4” Hex Head Bolts
- Double-Stick Tape
- 1/8 inch Frosted Acrylic or ground glass.
Bellows Materials
- Window Blackout Film 17.5 x 78.7 Inches for the 210mm bellows.
- Window Blackout Film 29.5 x 78.7 Inches for the 300mm bellows.
- 65lb Cardstock or something similar.
- 3M Max Strength 90 Spray Adhesive
- M3x12 Flat Head Wood Screws or #4x1/2” Flat Head Wood Screws
Accessories
These are the third-party products and 3D prints that I used to set up the camera the way I like:
Graflok-compatible film holder
The stock vega film holder uses elastic to hold the focusing screen in place, and it’s really convenient for slipping the film carrier in when you’re ready to take the picture, but I wanted to use accessories that conform to the Graflok standard, so I found this Vega 4x5 Graflok Film Holder.
Lomograflok back for Instax Wide film
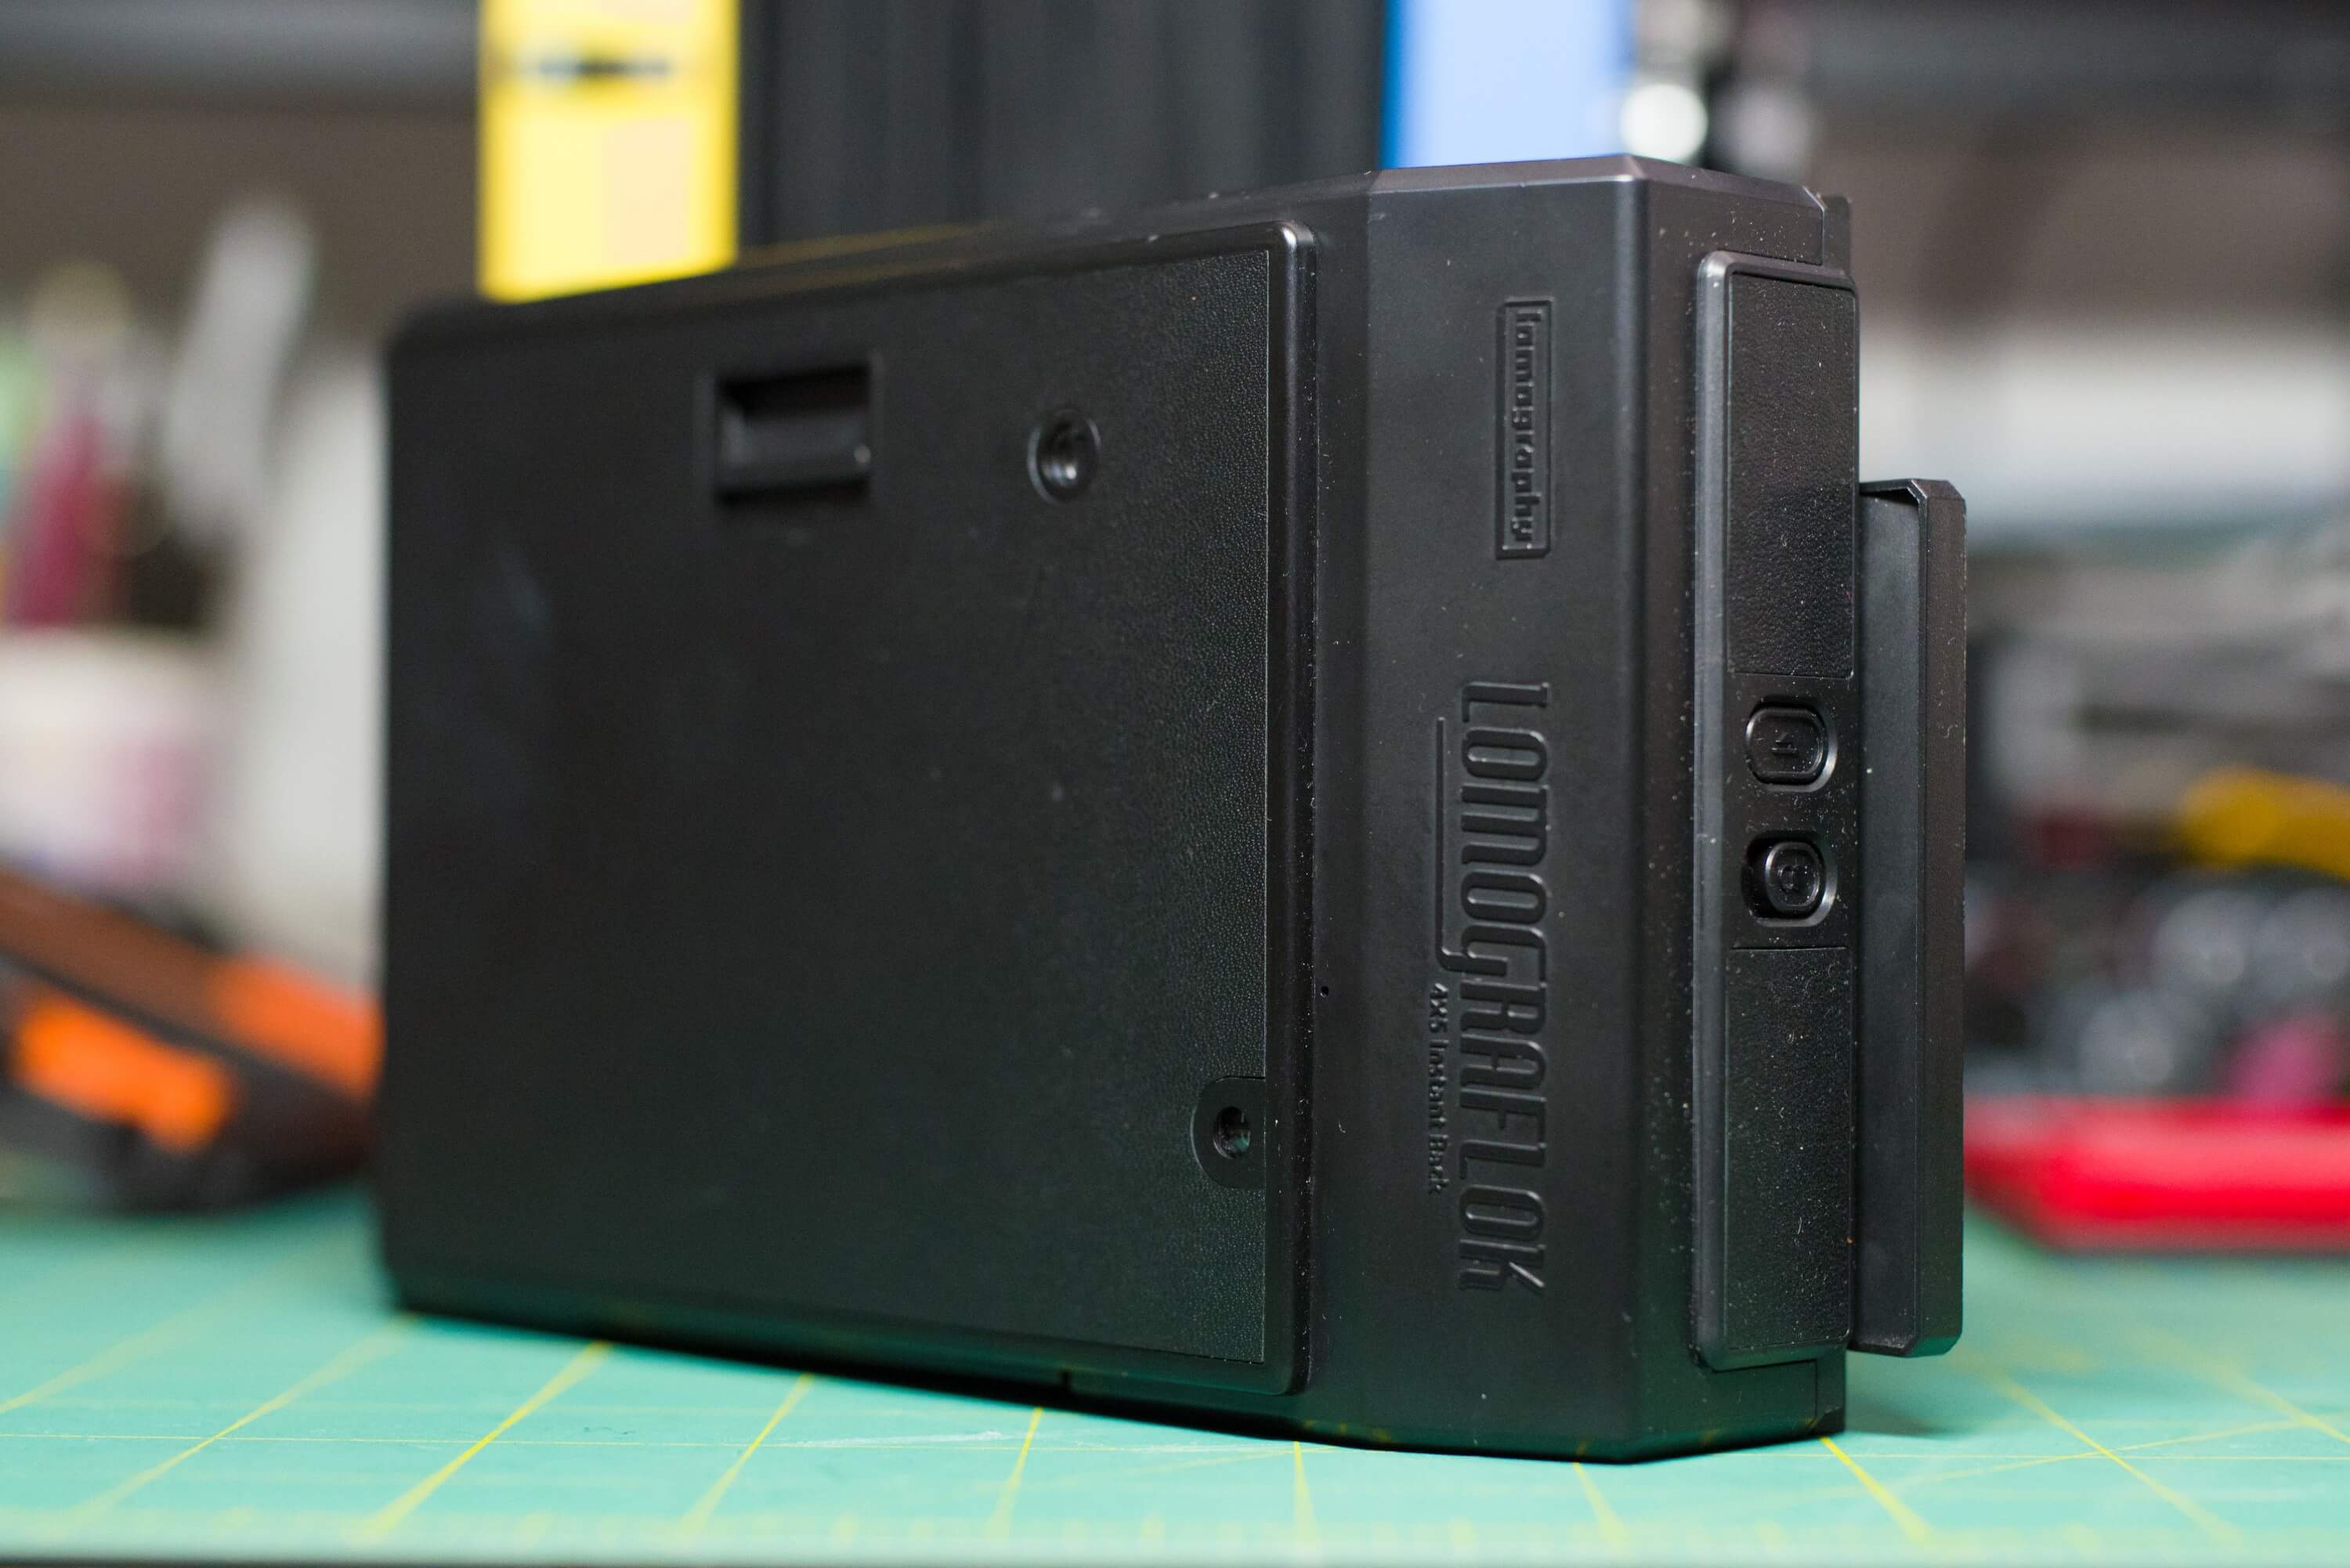
The Graflok film holder allows me to use the Lomograflok back from Lomography. It holds Instax Wide film, a fantastic integral instant film from Fujifilm. The film isn’t cheap, but it’s still cheaper per shot than 4x5 film, so I knew I wanted to use this for practice and creating unique images.
Graflok-compatible Lomograflok Ground Glass Holder
The Lomograflok back holds the Instax Wide film farther away from the lens than normal 4x5 film carries would, so I found this Vega Lomograflok shifted ground glass holder. It offsets the focusing screen down and to the right while also keeping it farther away from the lens so I can achieve (almost) perfect focus every time.
Fresnel Lens
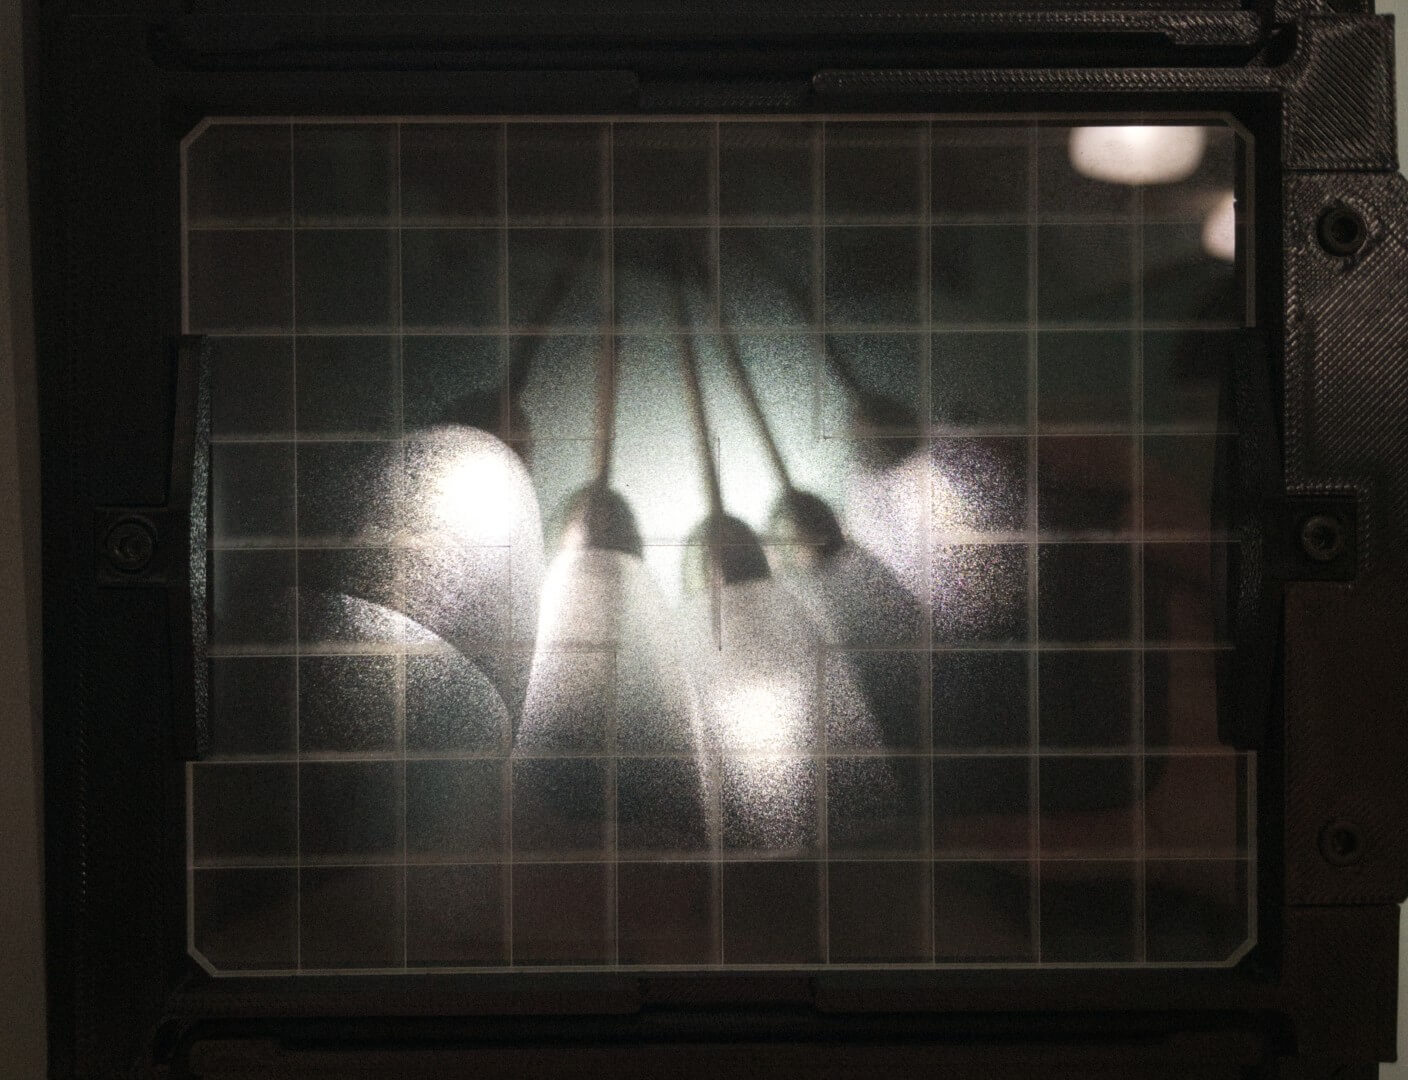

I noticed that the focusing screen was really dim, and I could only see a small circle of the image at any time. I had to move my head around to see the corners, and even then they were very dark. I discovered that it’s common practice to place a fresnel lens over the focusing screen, which helps even out the light and make the image appear brighter on the focusing screen. I found this great one from eTone. Honestly, I don’t know exactly how it works, but it does!
Focusing Hood
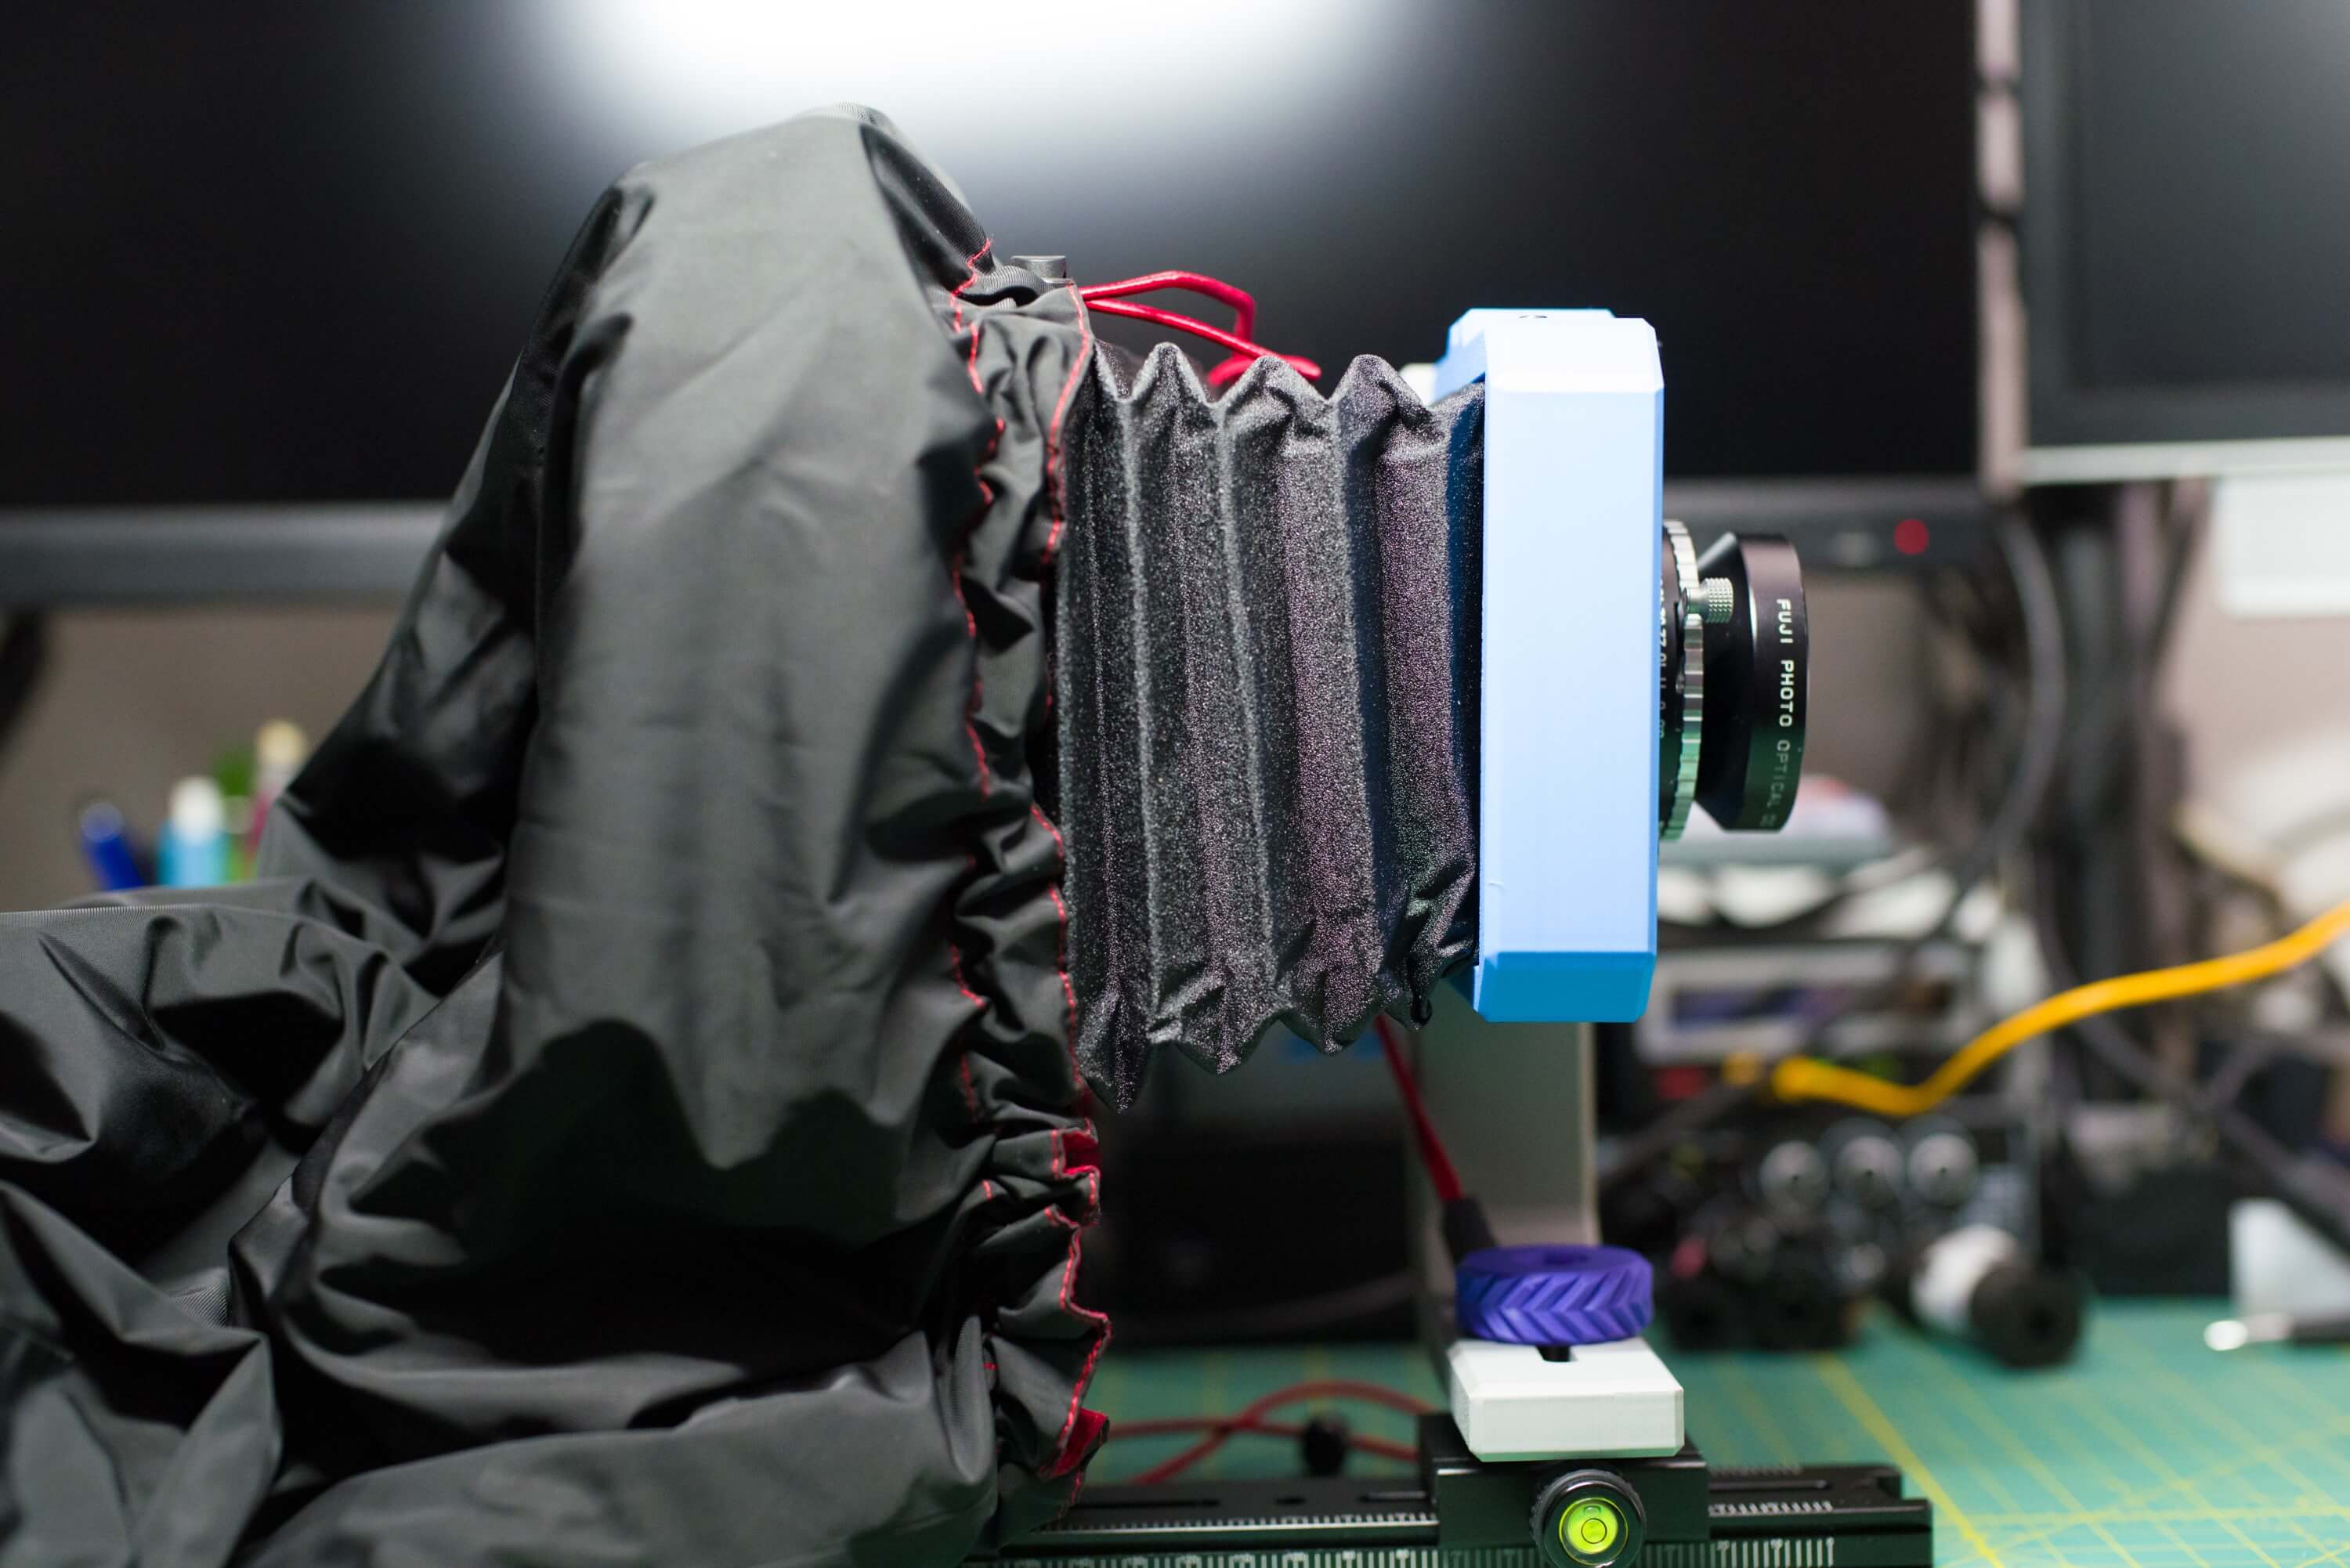
As bright as the focusing screen is with the fresnel lens over it, I still needed something to block out as much ambient light as possible while I’m getting the framing and focus set just right. I opted for this one that is a tube shape with elastic on either end. So far it’s working out well.
Lens Wrench
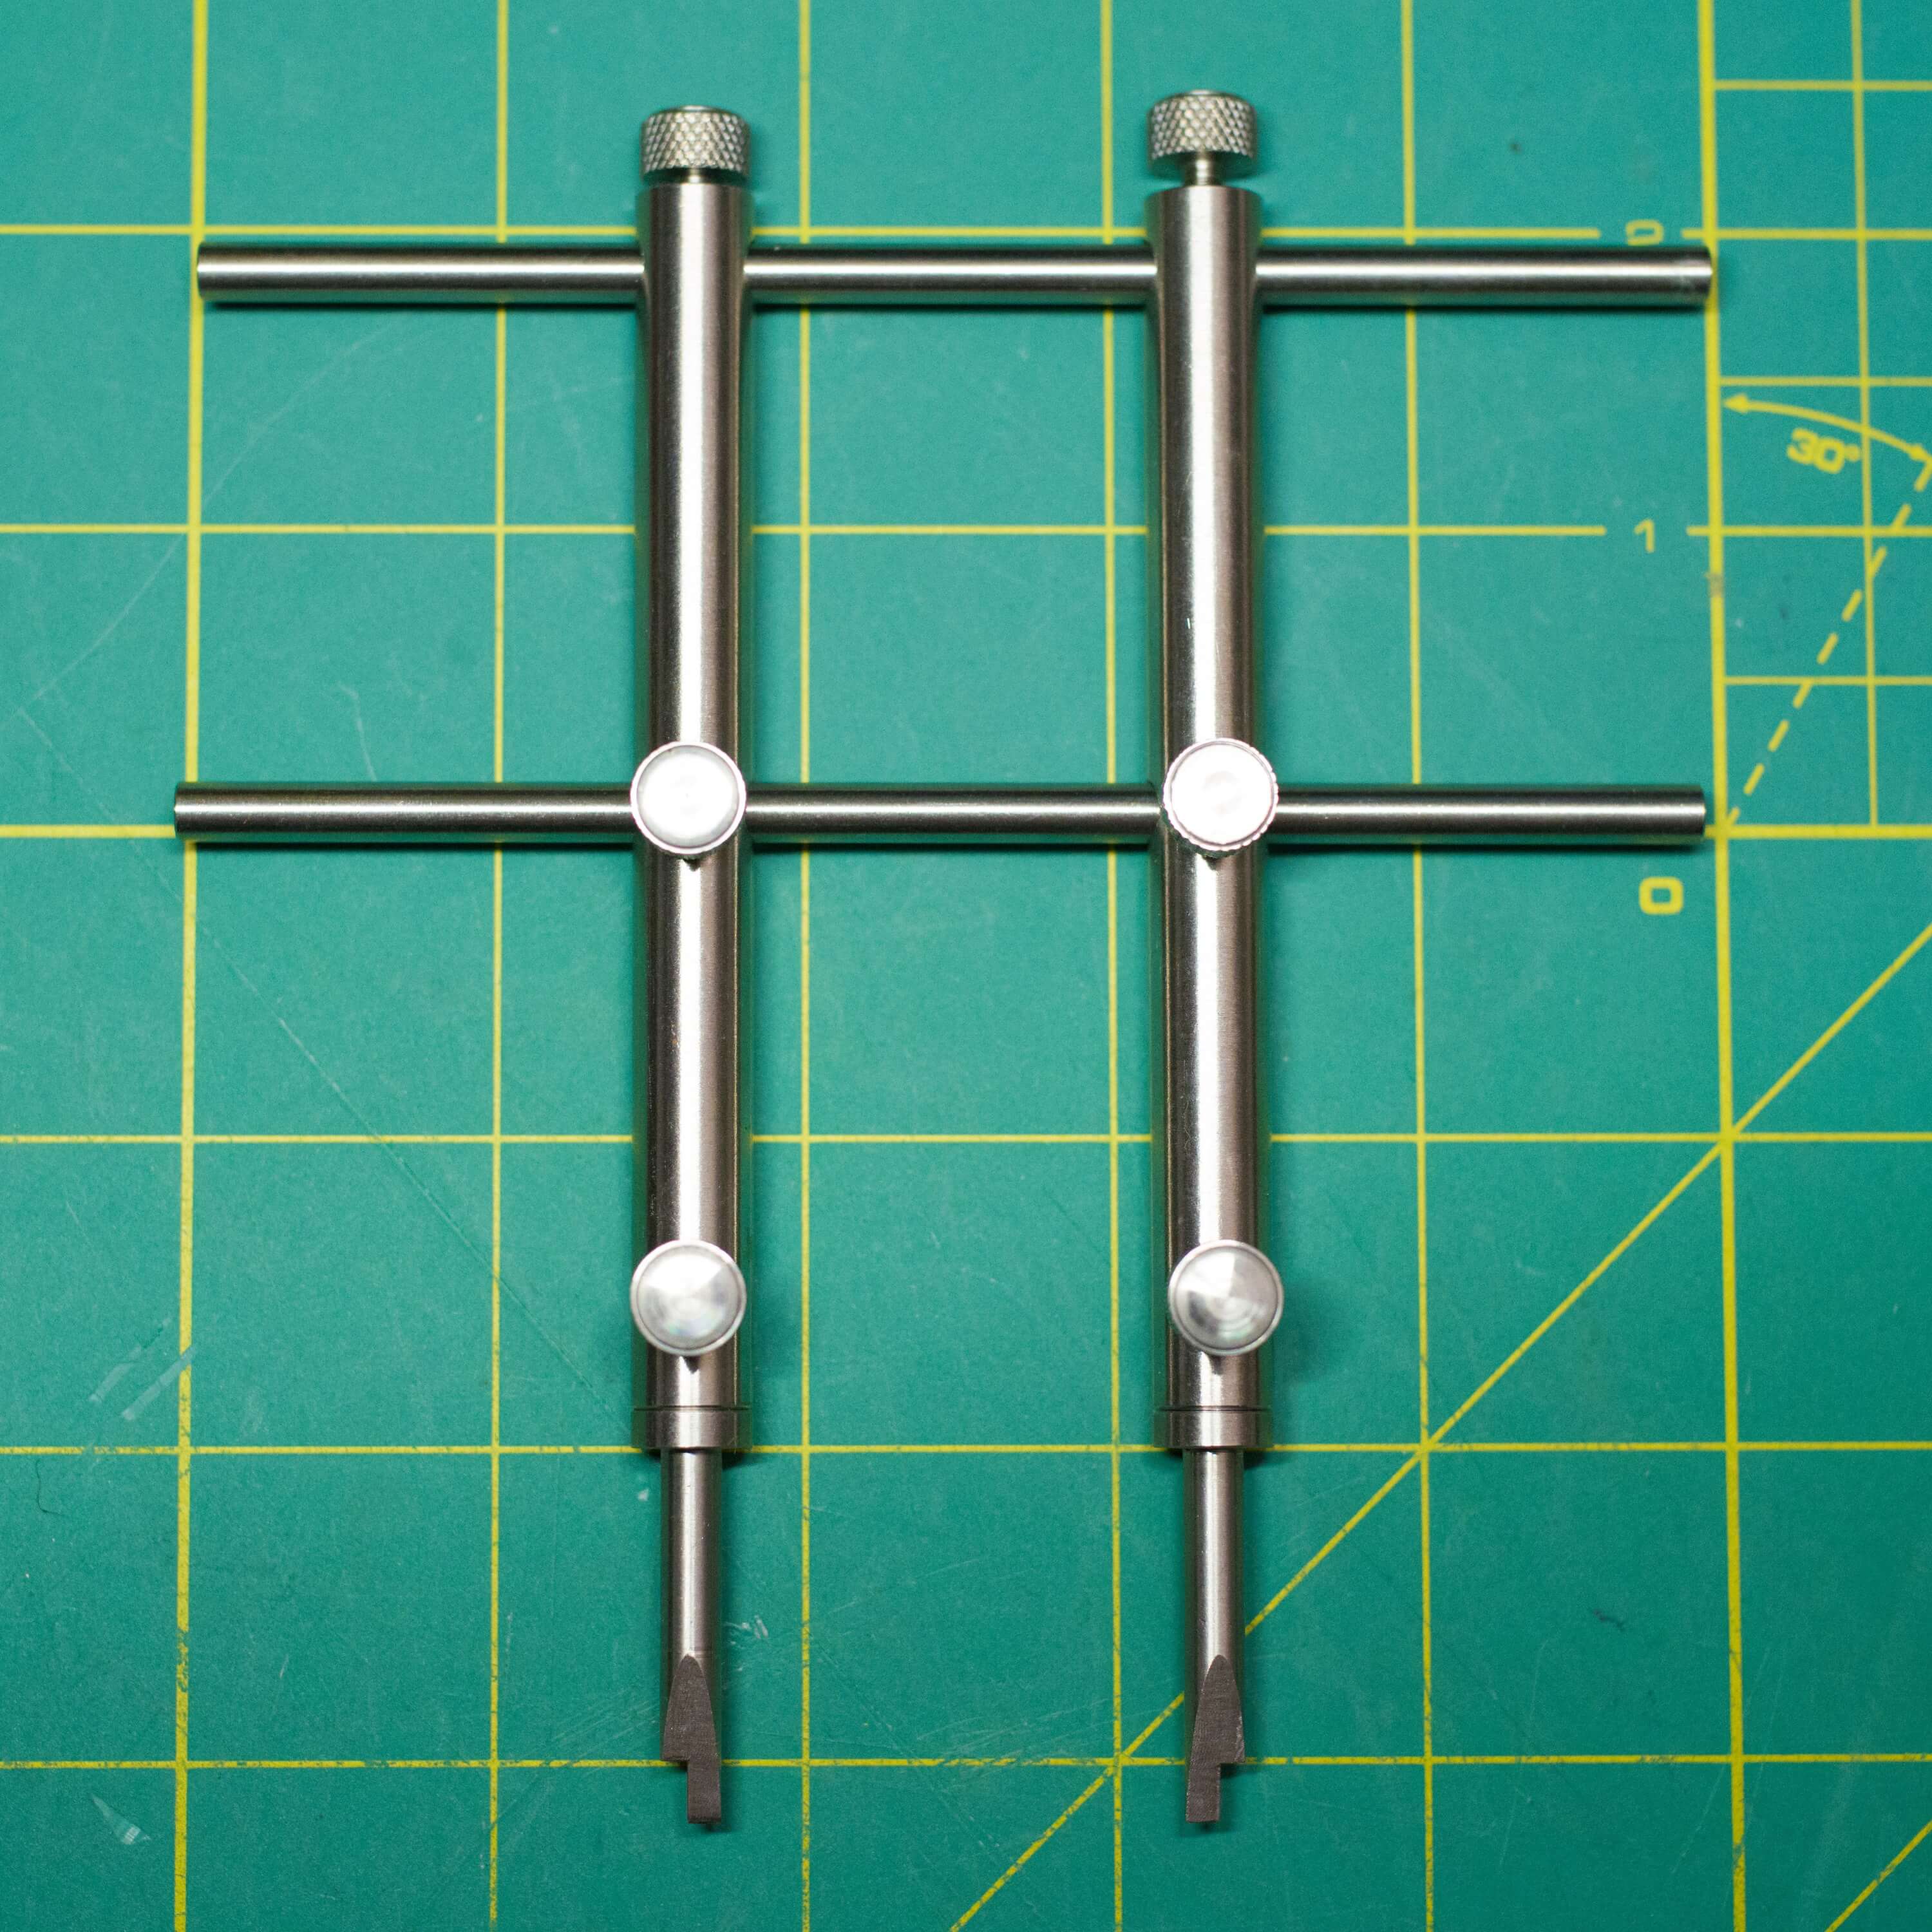
As I covered before, large format lenses are screwed onto a lens board so they can be mounted in the front standard. The nut that needs to be tightened to secure the lens to the lens board has notches on the outer edges (unlike a standard nut that has 6 flat edges). After getting very frustrated with the lens loosening over time, I finally picked up a dedicated lens wrench from eTone. It’s fully-adjustable, made entirely of metal, and has worked perfectly so far. It is also useful for disassembling/reassembling lenses, which will be very useful for a couple of future projects I have in mind.