Creating a Nintendo Extension Controller Adapter for Atari and Commodore Computers, Part 1
I have a special place in my heart for games on the Atari 2600 and Commodore 64 systems, but the input methods leave something to be desired. In the 80s, digital joysticks were the standard controller for home game consoles. I suspect this is because arcade machines used joysticks, and many home consoles were attempting to bring the arcade experience into the living room.
Regardless of the reasons, the standard joysticks that shipped with the Atari 2600 are really bad. They’re super stiff and have a small range of motion, which is a surefire way to cause hand cramps and frustration (for me, anyway). Even when I was a kid, I would use a Sega Genesis controller on our Atari 2600 instead of the stock joystics. I was able to do this because Sega, Commodore, and other computer/game console manufacturers used the Atari Joystick Port de facto standard.
Even using the Genesis controller is not perfect, especially for platform games. If a platform game allows you to fire a gun or perform an action, that action is taken up by the Fire button (which is A, B, and C on the Genesis controller), and jumping is relegated to pressing Up on the d-pad. This is very frustrating for anyone who’s used to pressing a button to jump. So, I knew whatever solution I came up with needed the ability to remap the buttons so that I could assign Up to a button.
The Atari Joystick Port Standard
Take a minute to look at the Wikipedia article, as it’s chock full of useful information. Here’s the short version: The Atari Joystick Port is 9 pins:
- 1 pin for Ground
- 1 pin for +5V
- 4 pins for Up, Down, Left, and Right
- 1 pin for Fire
- 2 pins for additional buttons or paddle controllers (potentiometers)
(Keep in mind that not all systems that use this this connector follow the same wiring scheme. It’s important to check the Other platforms chart before accidentally frying your classic computer or game console.)
When a direction or Fire button is pressed on the joysick, it physically connects the associated pin to Ground. This is a simple but effective way of registering button presses, and means that the joysticks can be made very cheaply.
Exploring Options
Armed with this information, I originally decided to modify an existing game controller to work with the Atari Joystick Port. I didn’t want to modify an original controller, so I started researching aftermarket controllers. I kept thinking that I probably wouldn’t be happy with the button feel of an aftermarket controller, so I started looking into modifying a NES Classic or SNES Classic controller, since you can still buy those new.
A Revelation
However, when I started researching the NES Classic controller, I learned that they use I2C, and that there was already an Arduino library called NintendoExtensionCtrl that simplifies the process of reading button presses from the controller.
Prototyping
I’m going to format this like a recipe to make it easier to follow. Here’s what you need:
- 1 Arduino Nano
- 1 WiiChuck (affiliate link) or Nunchucky (The instructions will use the WiiChuck)
- 1 Bi-Directional Level Shifter (affiliate link) (Not required if you use a microcontroller with 3.3v logic levels.)
- 1 NES Classic Controller (SNES Classic or Wii Classic controllers work, too)
Wire it up as shown in the picture.
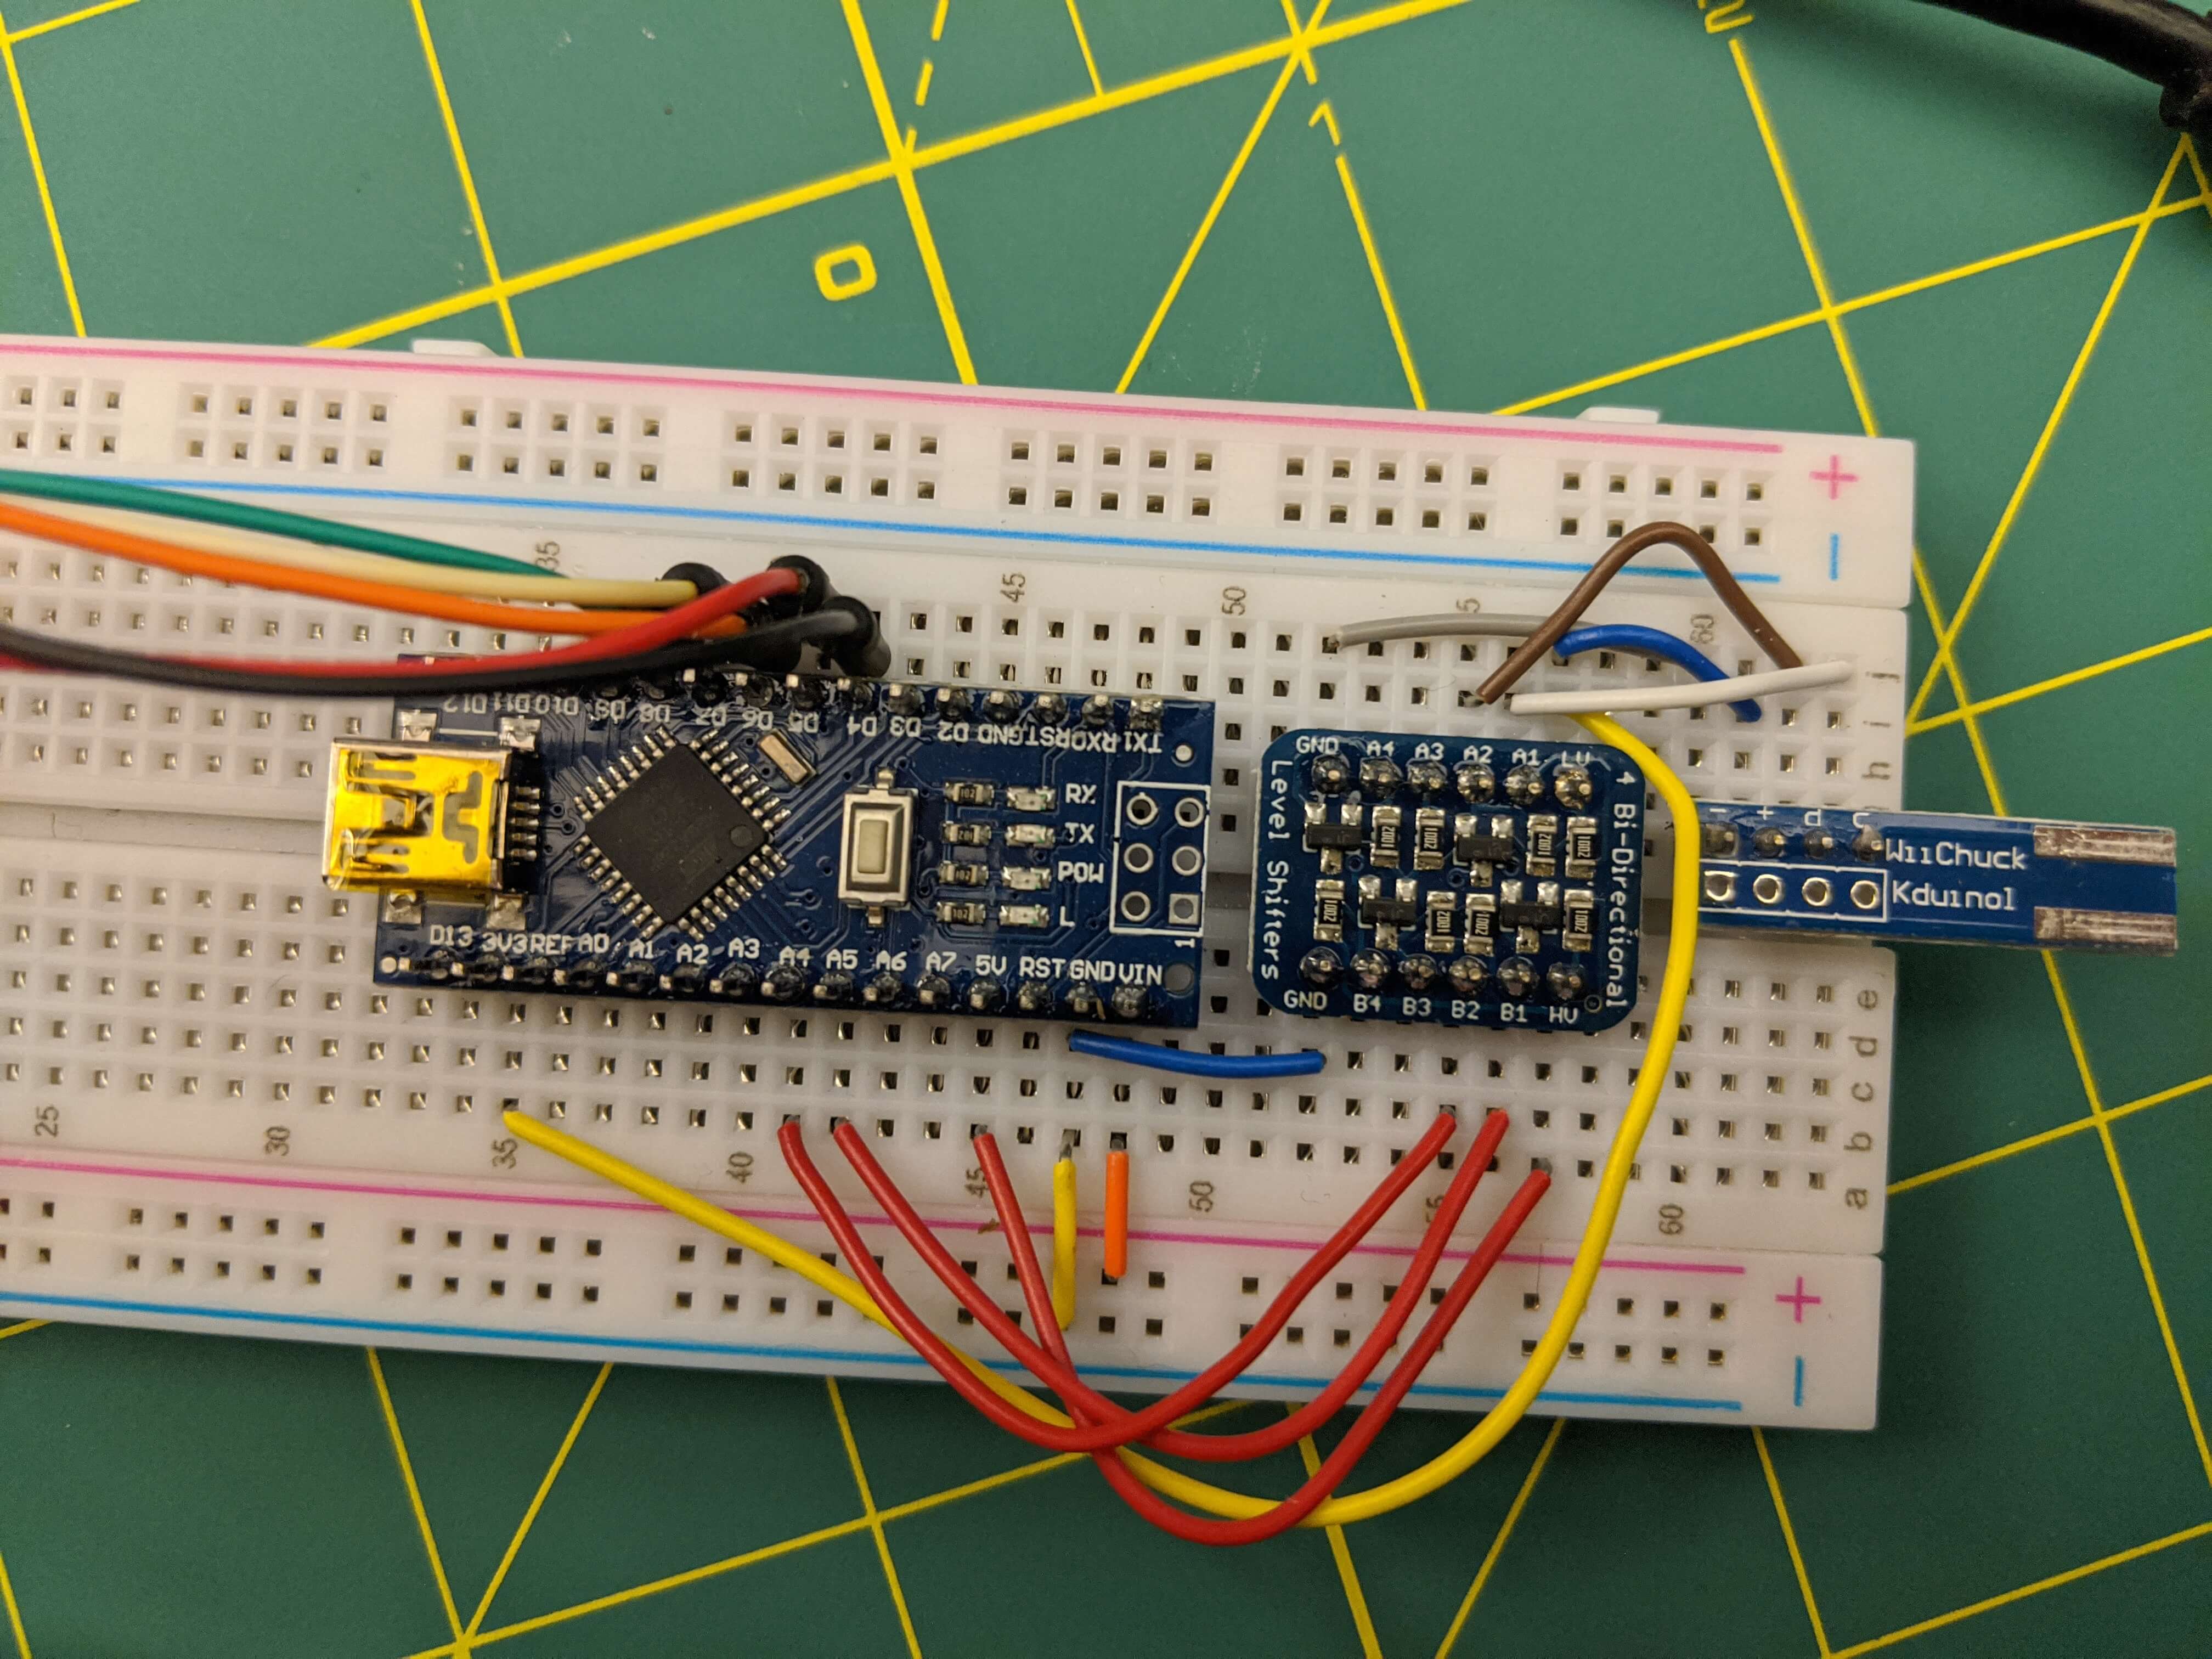 Ignore the wires in the top-left connected to D4-D8. Those are for later.
| Arduino Nano | Level Shifter | WiiChuck Adapter |
|---|---|---|
| 3v3 | LV | + |
| 5v | HV | (No connection) |
| GND | GND | - |
| A4 (SDA) | B2 –> A2 | D |
| A5 (SCL) | B1 –> A1 | C |
The connections between A4/A5 on the Nano and D/C on the WiiChuck go through the level shifter because the NES Classic controller is designed to handle 3.3v logic levels, and the Nano outputs 5v logic levels. You may be able to operate the NES Classic controller at 5V logic levels, but it may damage the circuitry in the controller. If you are using an Arduino (or other microcontroller) that outputs 3.3v logic levels, you can omit the Level Shifter column above.
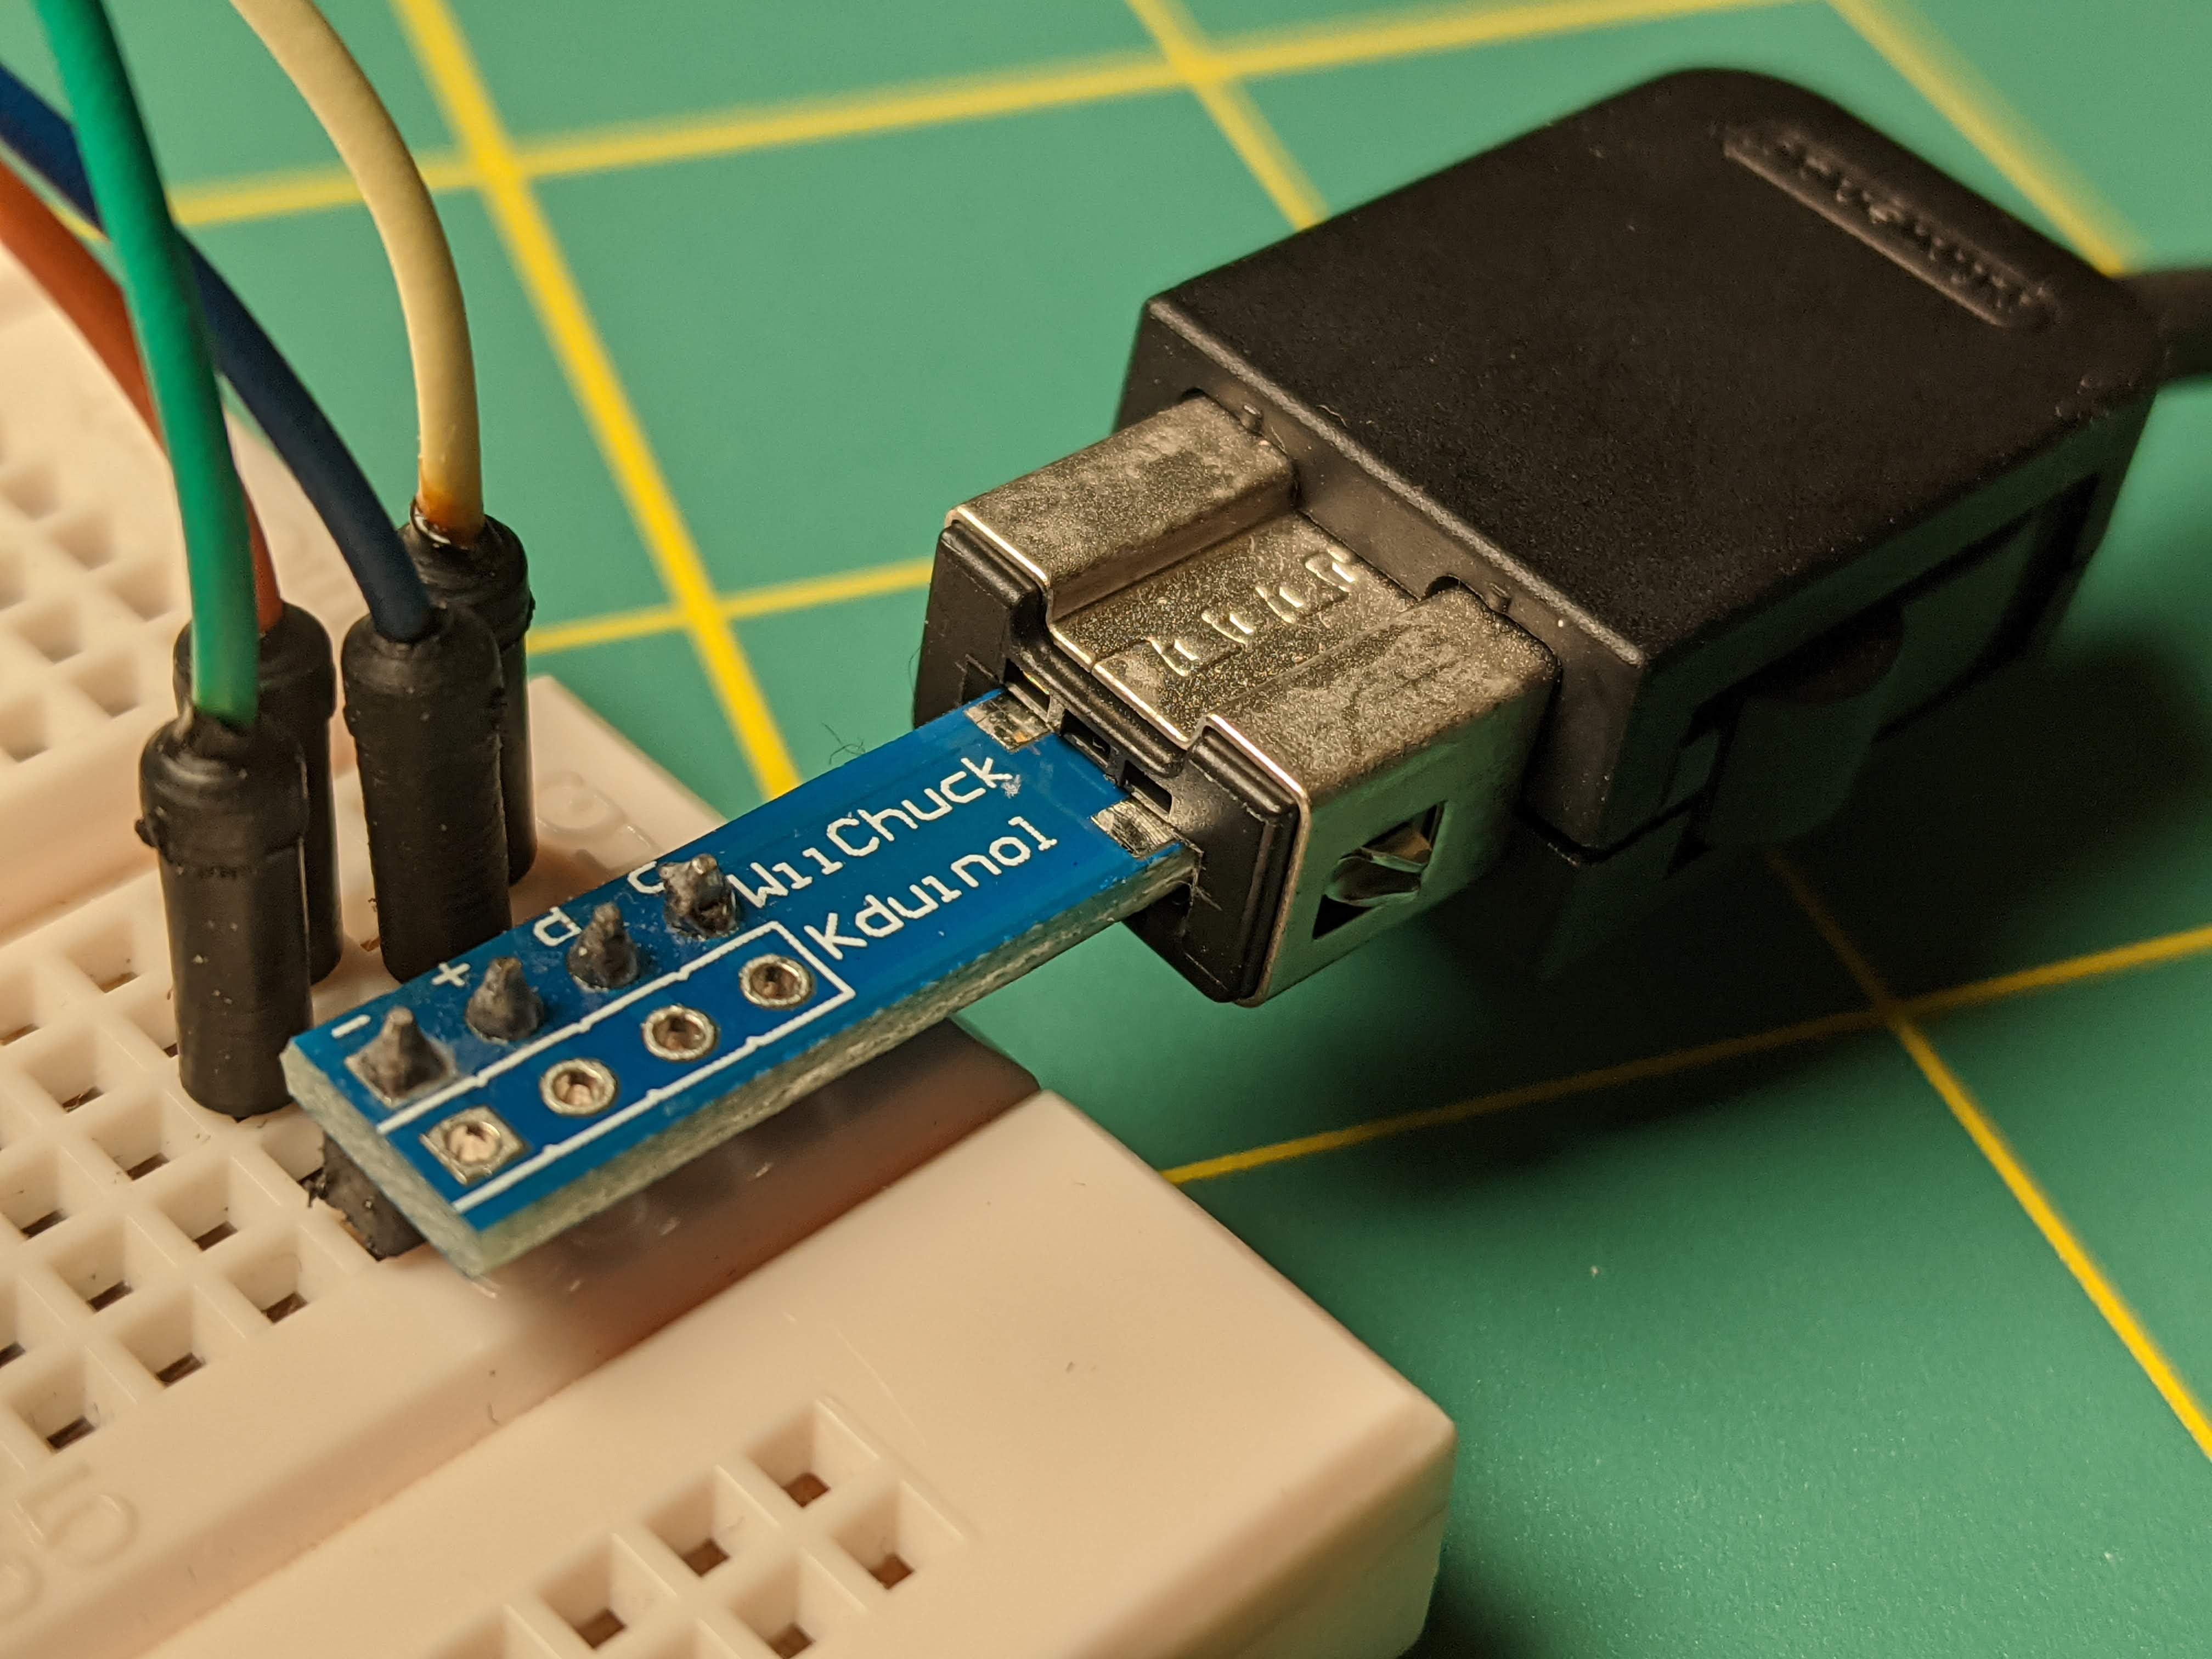
Plug in the NES Classic controller with the notch side up, and run the example code. You should be able to see all of the buttons you press show up in the Serial Monitor.
In the next post, we’ll figure out how to interface our Arduino with a Commodore 64!